
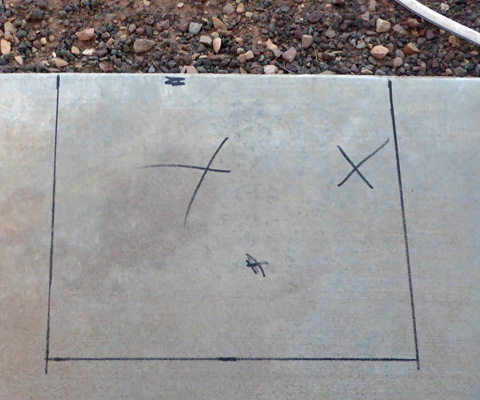
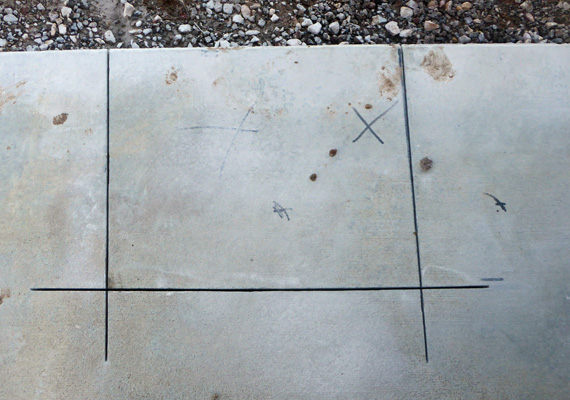
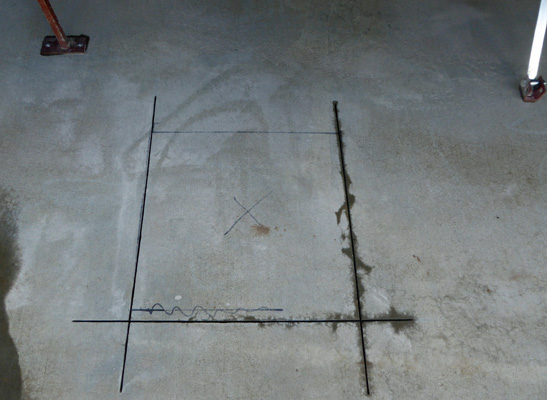
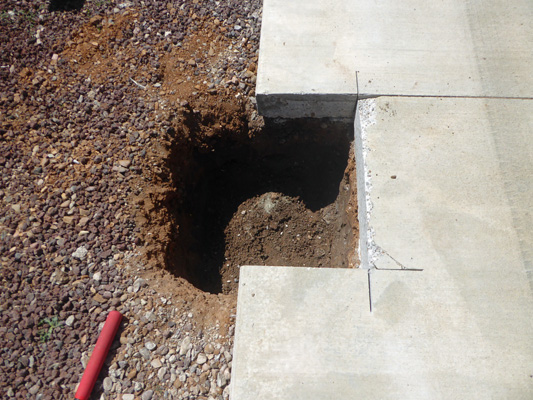
The concrete pad is about 4 ½ inches thick. There’s no code for RV parking pads (or for placing a park model). But to build an stick built addition you need to cut the concrete out and dig down 2 feet and then pour concrete into the holes. Our addition includes a deck, a large room, a car port and a shed all of which are stick built. So there were 14 holes marked on our pad. Lots of work ahead!
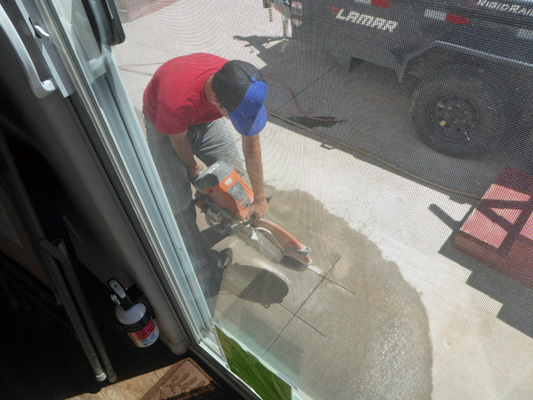
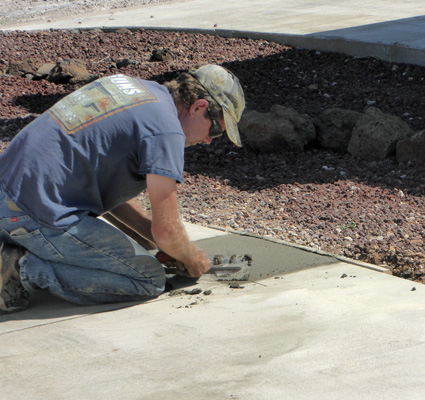
The next morning, along about 9:30, two young guys unloaded a bunch of equipment and started to work cutting concrete. This is the noisiest, screechiest messiest thing I’ve ever seen done.
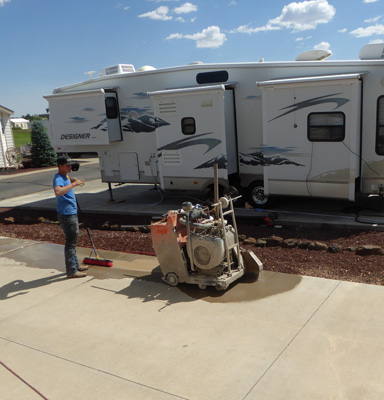
They use water to cool the blade and that at least means there’s no dust flying. But it does make concrete mud everywhere.
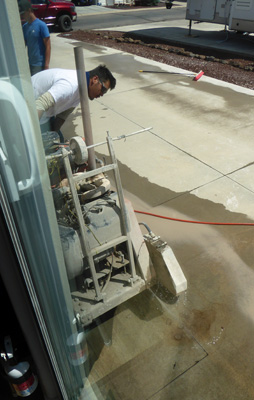
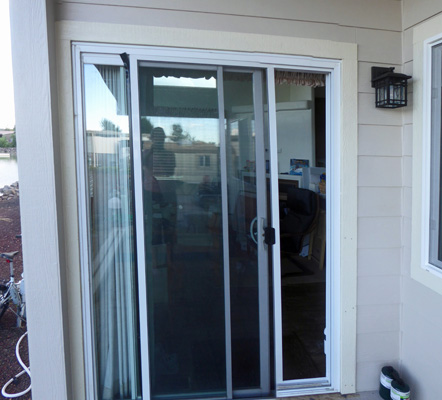
I got a great view of the process from our sliding glass door.
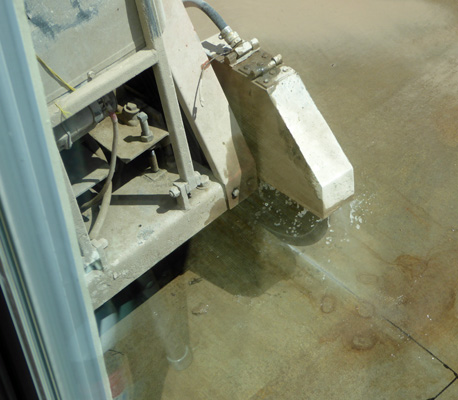
Here’s a closeup of the blade at work.
They had problems with their machine and finally gave up mid-afternoon and went home, leaving about 6 cuts unfinished. But at least some of them along the outer edges were done.
While others along the house side weren’t.
Monday morning, June 15th, Phillip and his helper, Joe, arrived to begin lifting out the cut concrete and digging the required holes.
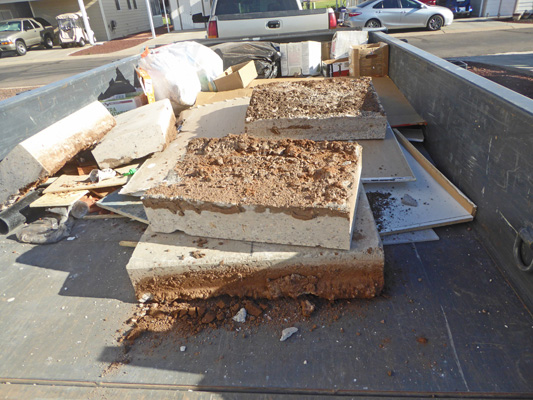
Just as they got started digging, Phillip got the news that the county had put a hold on all inspections at Juniper Ridge Resort. He couldn’t get ahold of anyone to find out why but he decided that they really shouldn’t be digging2 foot-deep holes that someone could fall into if the hold was going to last any length of time. So they finished lifting out the concrete and left.

I sent an email to the chairman of our HOA Board of Directors and in the end the problem got straightened out. Juniper Ridge is being required to do a drainage study because water from the golf course drains off the property into the development next door, flooding people’s crawl spaces. The engineer in charge had put a hold on inspections until Juniper Ridge agreed to do the drainage study. That had happened on Friday but he had neglected to tell anyone and then had gone on vacation!
Meanwhile, the concrete cutters didn’t show up because they were still having equipment problems.
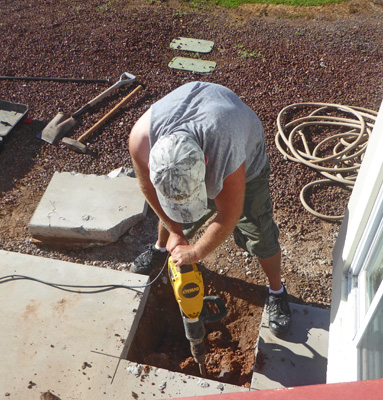
Tuesday June 16th, Phillip and Joe were back bright and early to dig holes. They have this nifty little jack hammer that works wonders on loosening up the soil so they can dig out the holes.
They spent the whole day digging and the concrete cutters didn’t show up again—this time one of the guys wasn’t feeling well (and of course now no one is supposed to go to work if they feel sick).
By the end of the day they had all the holes that they could dig done. And they were beautiful holes with straight sides and lots of precision.
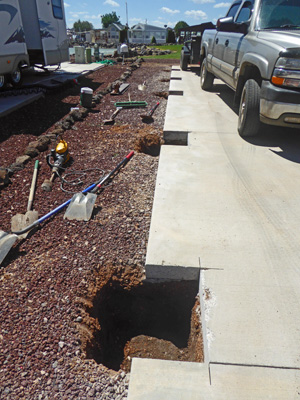
Here’s a shot of the holes along the far edge of the concrete pad.
Wednesday, the concrete guys arrived at last and went to work again cutting. They were finished by the time I set go to the grocery store (I had to ask that they put the stairs back so I could get out of the house).
I got back from doing the grocery store to find Phillip swinging a sledge hammer at the concrete. This did not look good. I had lunch and I went off to the pottery studio for a class and Phillip and Joe went to work dealing with the concrete that had in the end not been properly cut. They ended up using the jack hammer and a sledge hammer to get those pieces along the edge of the house out. Phillip was NOT pleased but they got it all out and all the holes dug and covered with pieces of plywood so no one would fall into them.
Thursday, the inspector came and looked at the holes and said they were good.
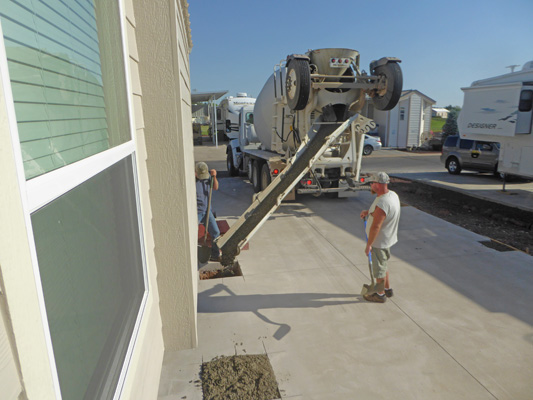
Friday morning first thing the cement truck came to fill all those pretty holes full of concrete.
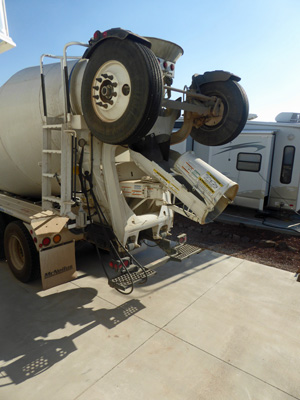
He backed all the way up on the pad and then they put the chute out and filled each hole.
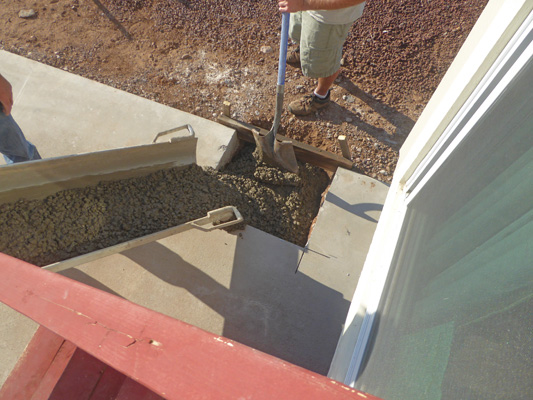
It was great fun to watch.
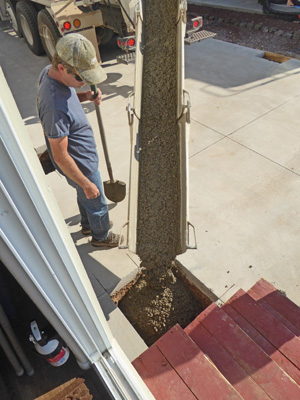
And they were so tidy there were no drips or plops anywhere.
Once the holes were filled they came back and smoothed each over.
And moved the excess from one place to another until they were all perfect. And then Phillip smoothed them again and again until they were all pretty as could be. And then Joe came by with a broom and gave them a swept finished.
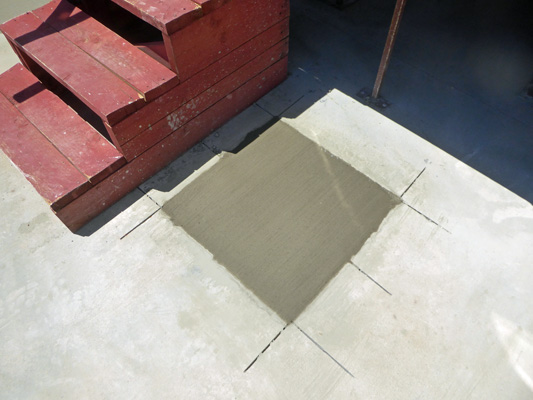
By the end of the day, they were dry enough to walk on and they had the weekend to set.
Tell me again, you say, why you had to do this? The original pad (which was close to 15 years old) was only 4 1/2" thick. That's fine to put an RV or a park model on. But the County Code requires that a stick construction must sit on a pier that is sunk 2 feet into the ground. It turns out even a deck here requires a pier that is 18" deep. So the solution is that you cut the concrete out, dig a 2 foot hole and then fill it up with concrete again.
Monday June 22nd, they began to work on building our shed while they waited for lumber to be delivered for the next stage.
Finally late in the day (long after Phillip had left for the day) the lumber arrived. They were late because a driver had called in sick—and so goes life as cases are rising in Arizona.
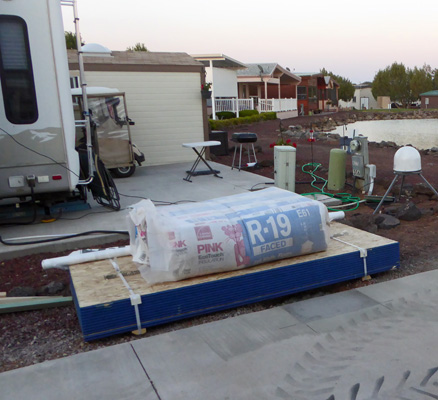
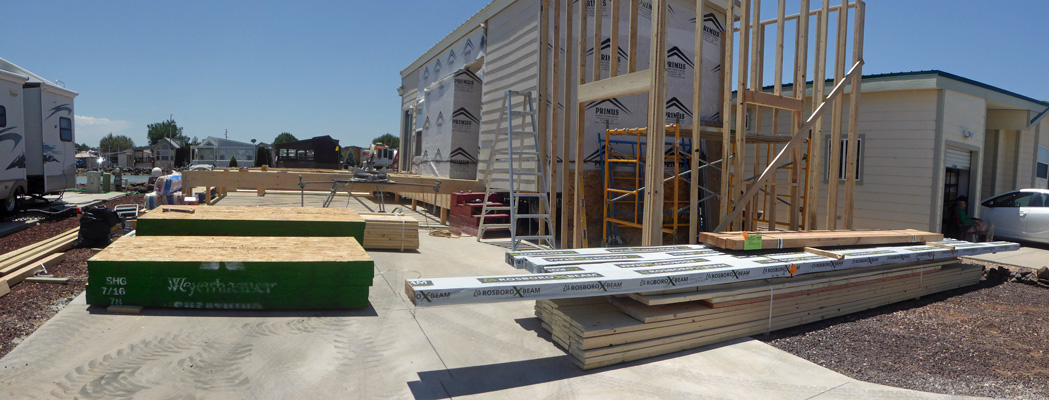
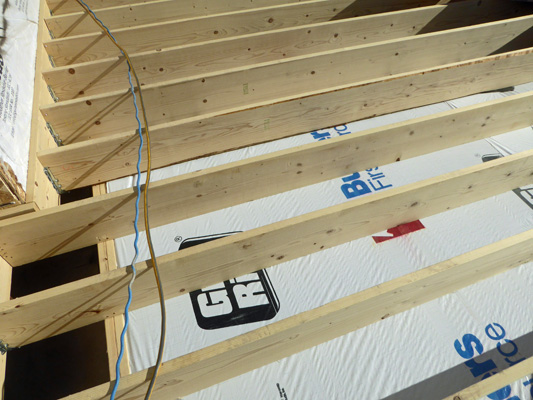
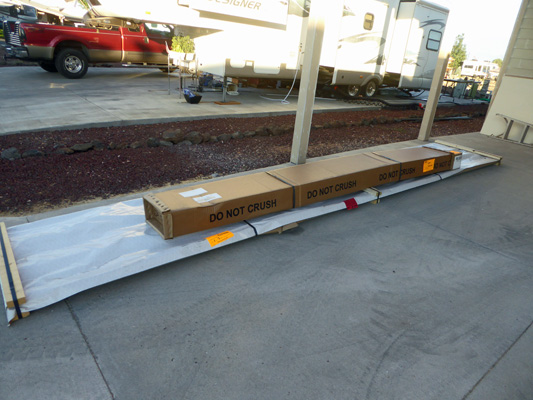
This pile of lumber would become the joists for the floor of the addition and the deck.
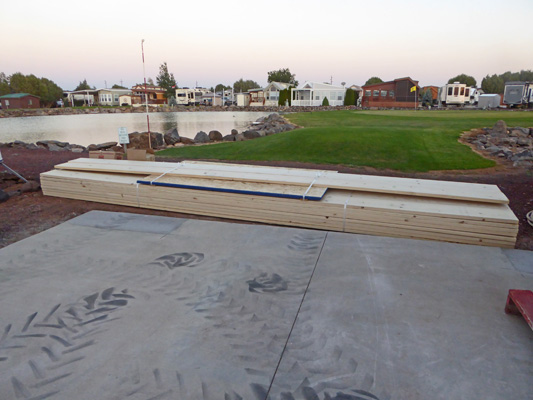
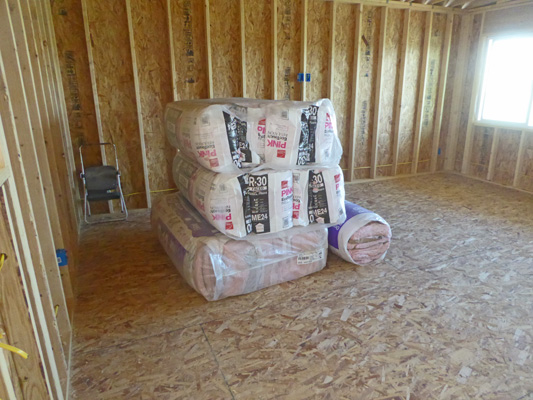
And here’s the insulation for under the floor and sheathing that goes on top of it.
June 23rd, they set about putting in the joists for the addition and the deck.

Lookie! We’re going to have a floor one of these days!
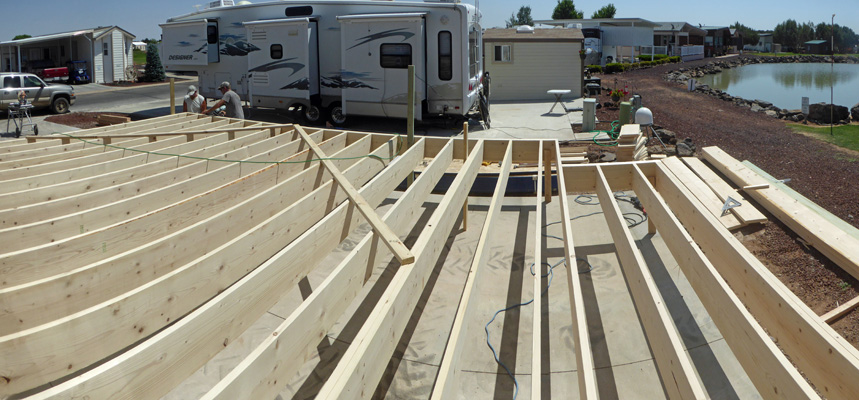
By the end of the day they were all done and ready for the inspector to come the next day.
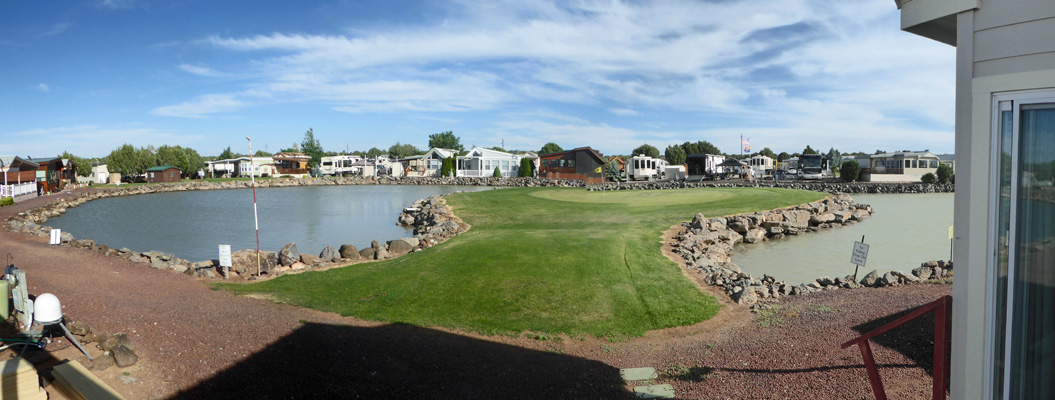
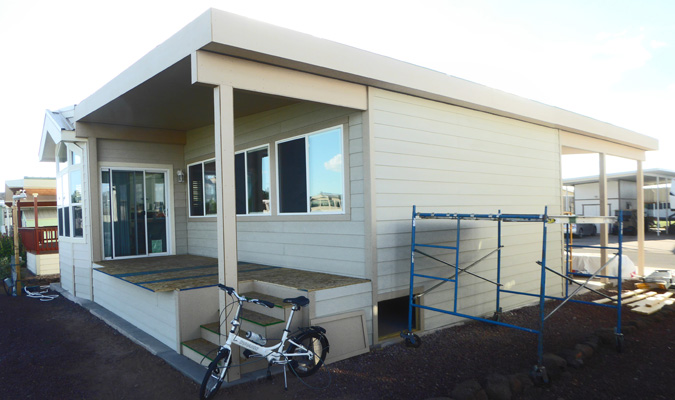
Here’s the view from the lake side of the house. The notch on the far right is where the stairs up onto the deck will be.
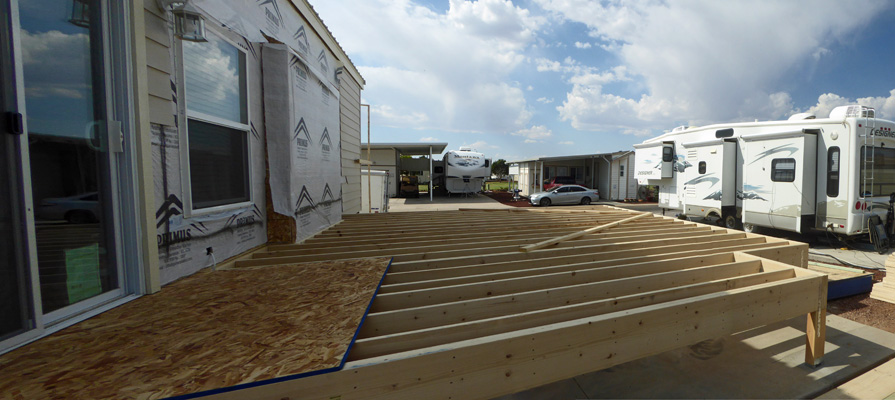
The addition will start right where the window is on the left. It will come out and we’ll have a walkway from the dining area into the living room.
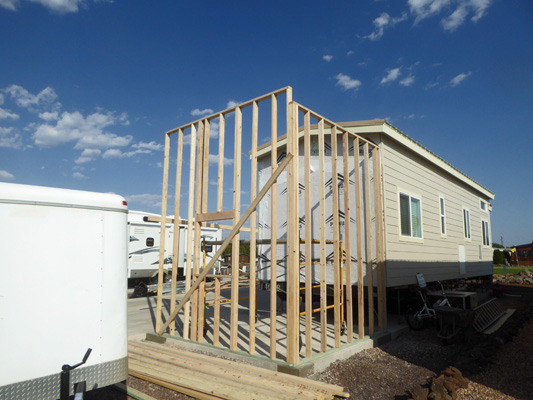
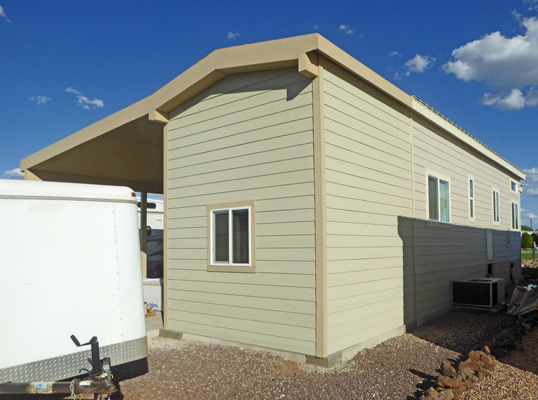
Here’s the view from the corner of the lot looking back at the park model.
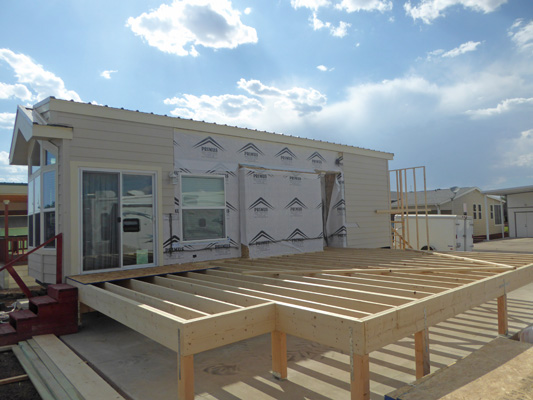
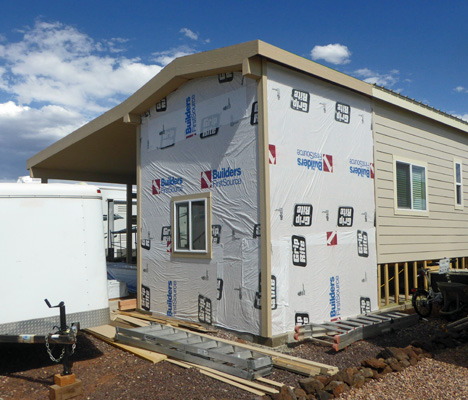
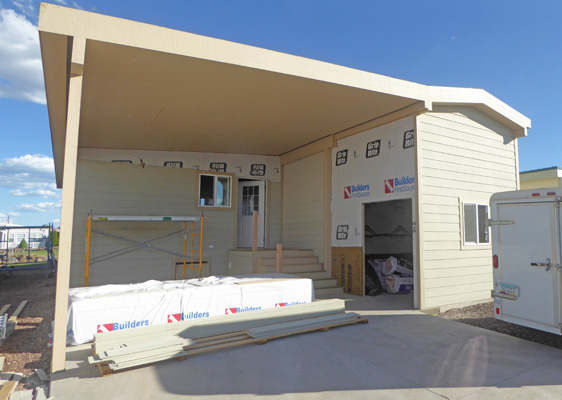
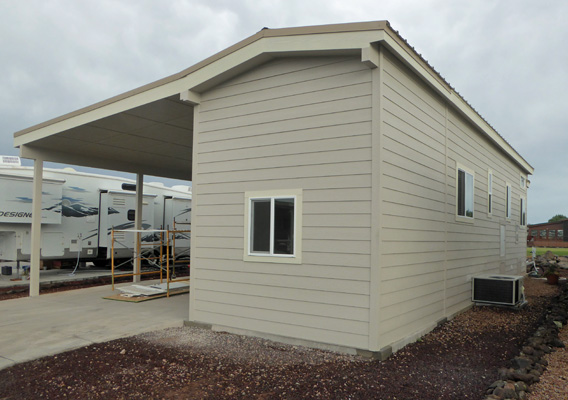
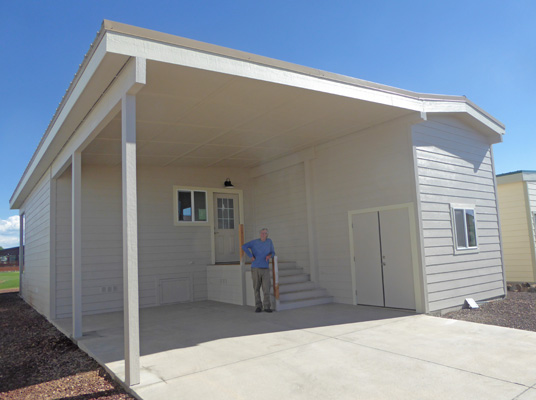
And here’s a view from the street side.
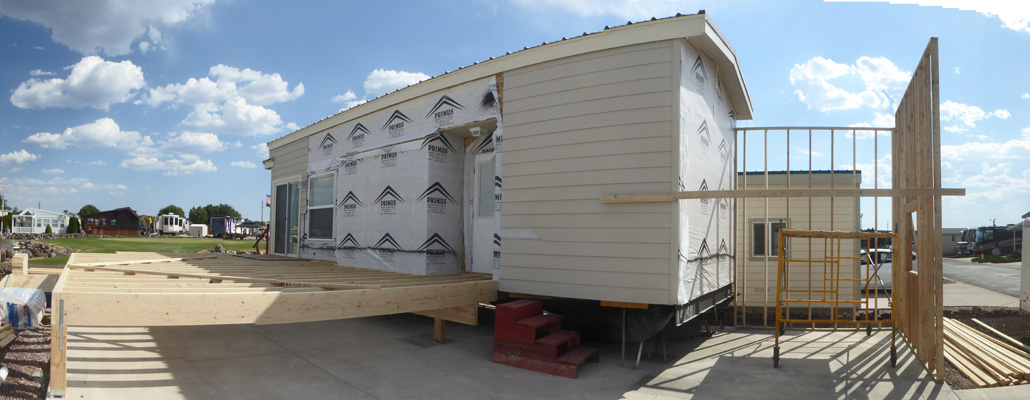
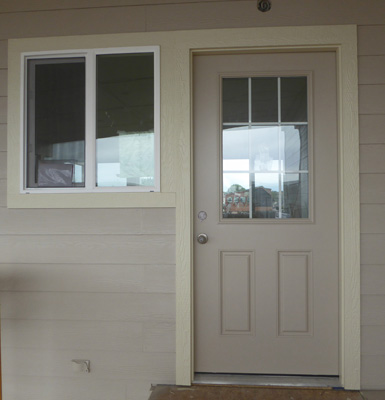
The carport will reach from the edge of the joists out to the end of the shed (on the right). The washer and dryer will be in a closet in that inset where the back door is now.
Wednesday June 24th, they had to wait for the inspector to look at all those joists and while they waited they put the last wall on the shed.
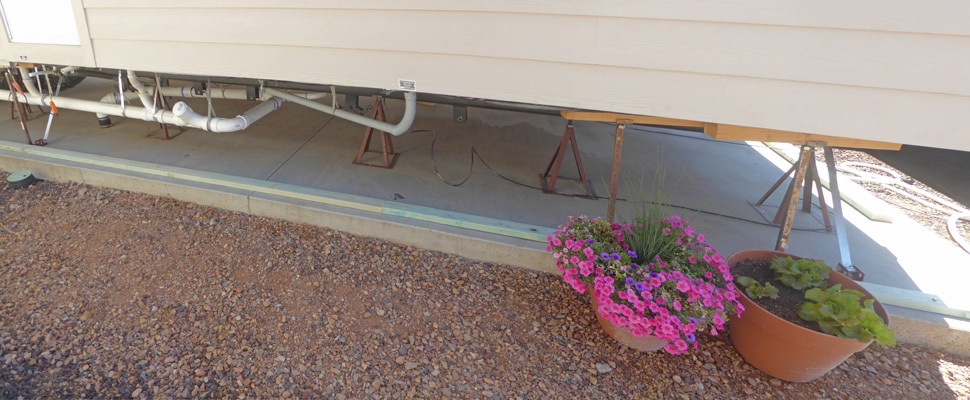
And then began to put the footer (the bottom board) around the base of the park model as a base for framing for the skirting.
They use a nail gun that literally fires blanks to drive the nails into the concrete!
Along about noon, we got yet another lumber delivery. This time I was home to watch the guy with his nifty fork lift that can turn on a dime.
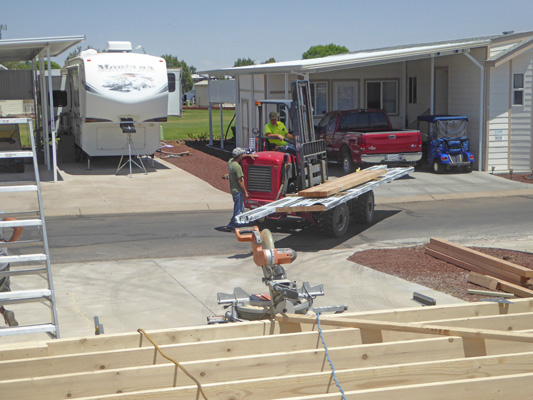
There were two stacks of different thickness of sheathing and the driver managed to put them down and then divide them into separate piles.
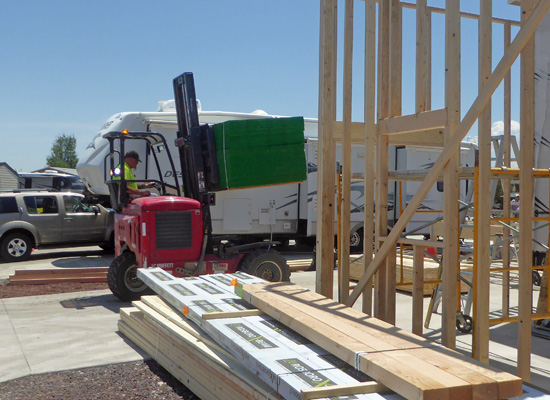
This time they filled the driveway up with lumber including some pretty long beams.
The inspector took his time arriving, so they proceeded to put framing in on the skirting on the park model.

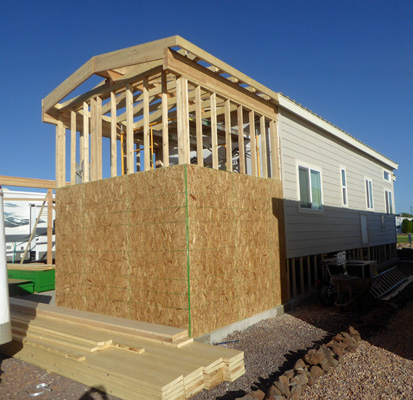
By the end of the day, the shed had its roof support beams up and half of its rafters.
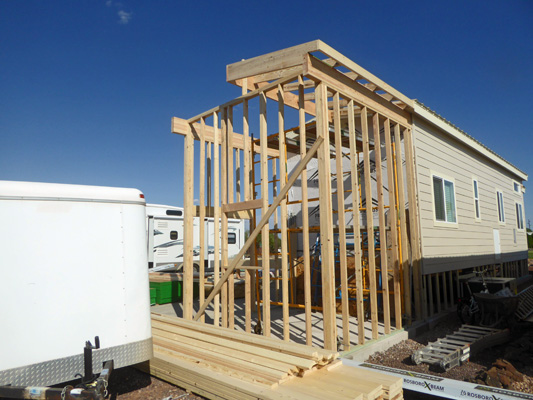
And yes, this is a TALL shed. Its roof line will match the park model. So we will have plenty of space to have storage shelves in the upper half. We could have had a loft but then you have to have stairs or a ladder and so we opted for the type of shelves you hang in a garage instead. We have those in our garage in Sahuarita and really like them.
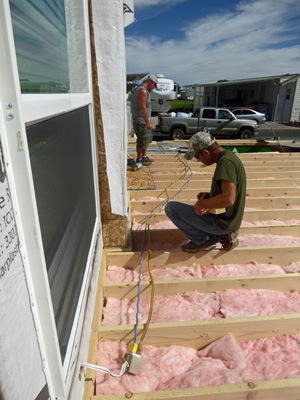
June 25th, they set to work bright and early putting the moisture barrier under the joists.
And then putting insulation on top of that between the joists.
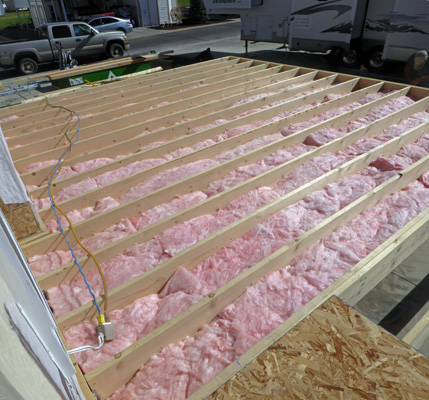
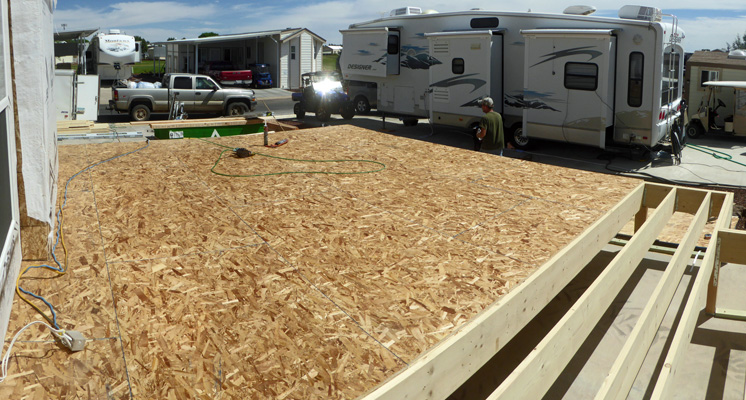
Once that was done, they began to cut the sheathing for the floors!
By 10 am the floors were nearly in.
They’d apply a layer of Dynagrip on the joists and then lay down the sheathing and nail it in place.
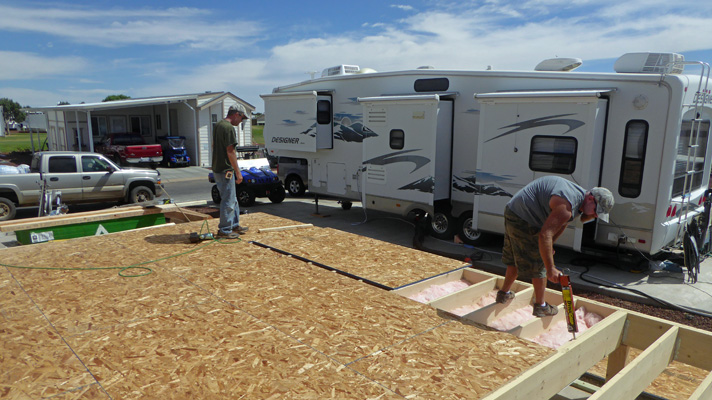
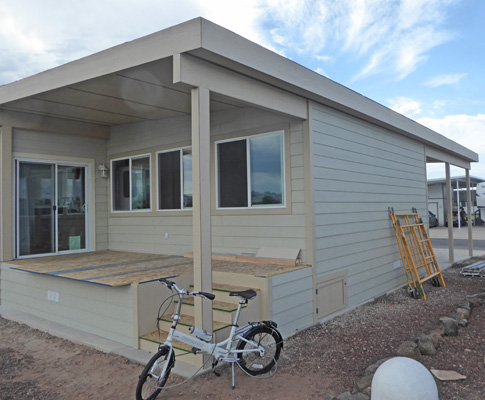
Here’s the floor of our addition. The area to your right is the deck. It will have temporary sheathing that will eventually be replaced with Trex decking (but not until after the painters are done).
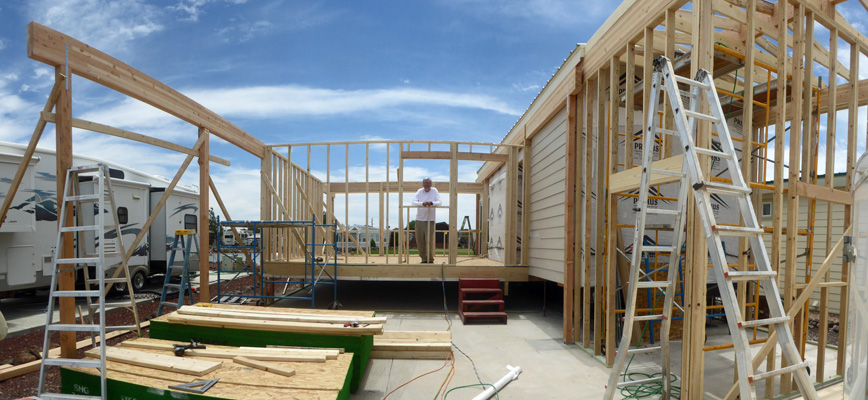
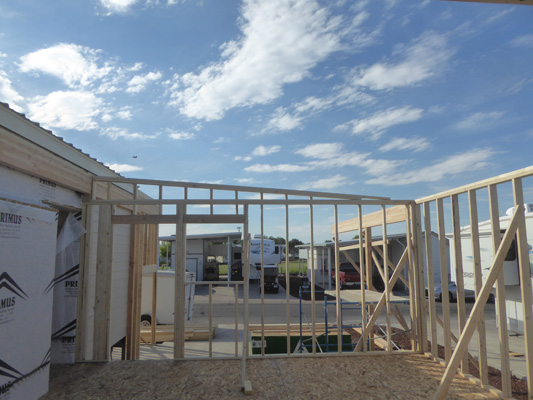
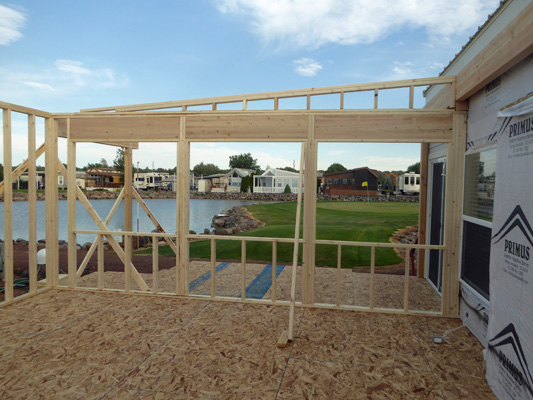
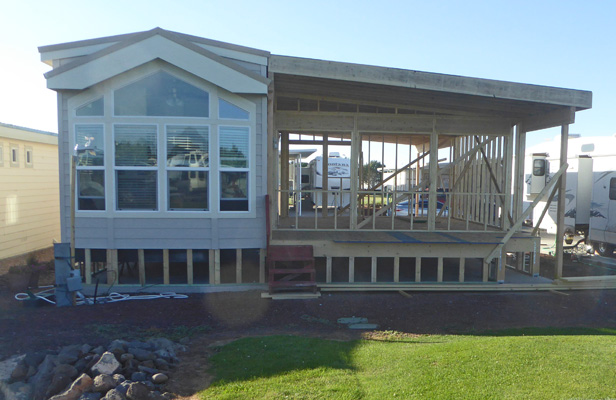
We went off for a picnic lunch and when we got home, we had walls!
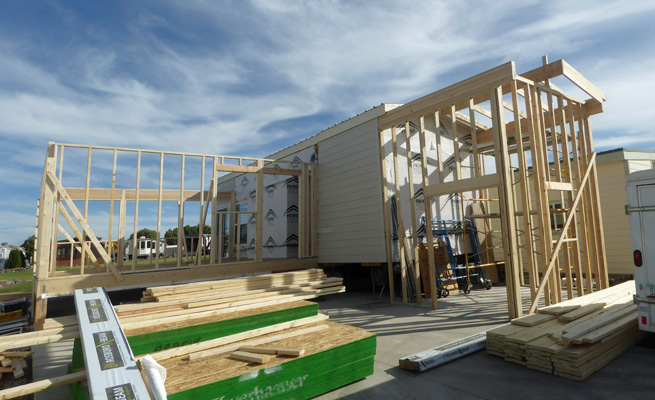
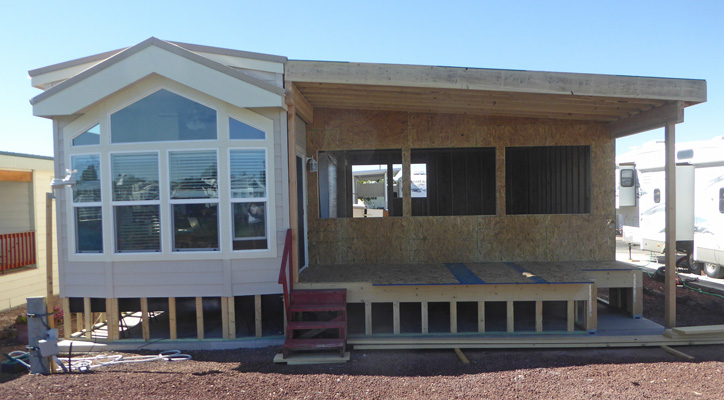
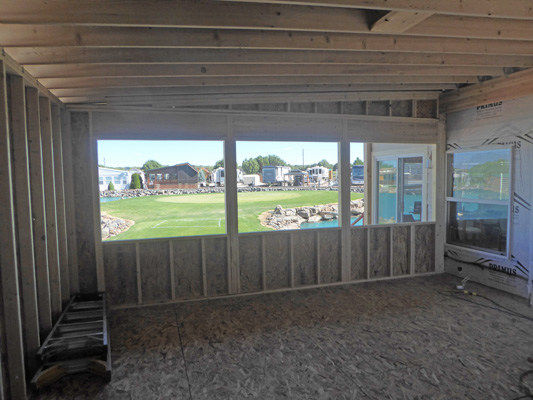
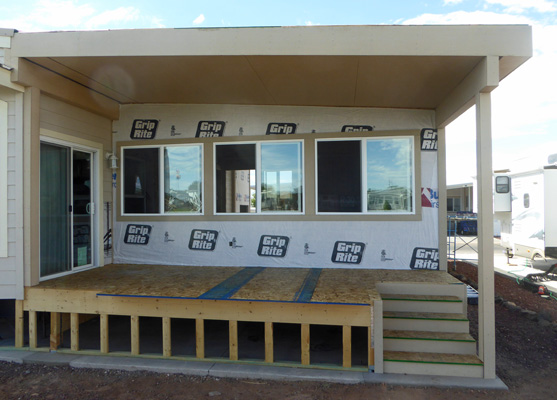
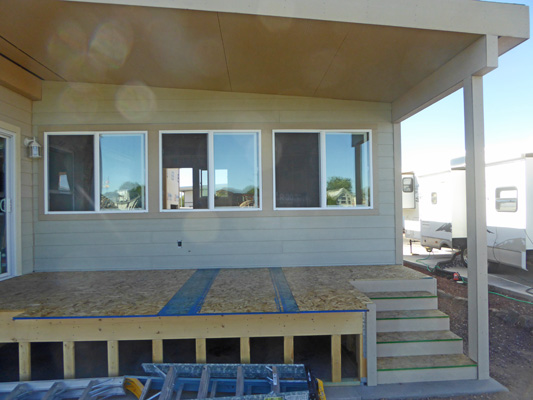
Here’s the view from the lake side. You can see the temporary flooring for the deck with the big room behind it.
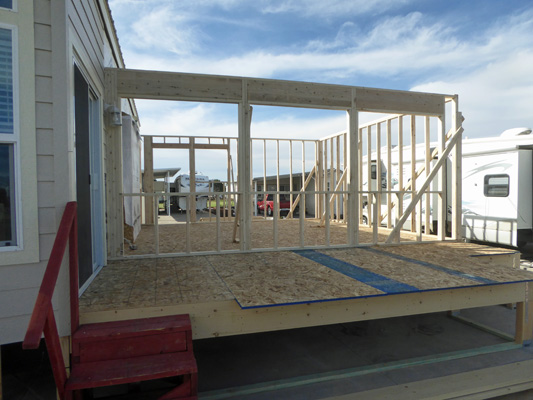
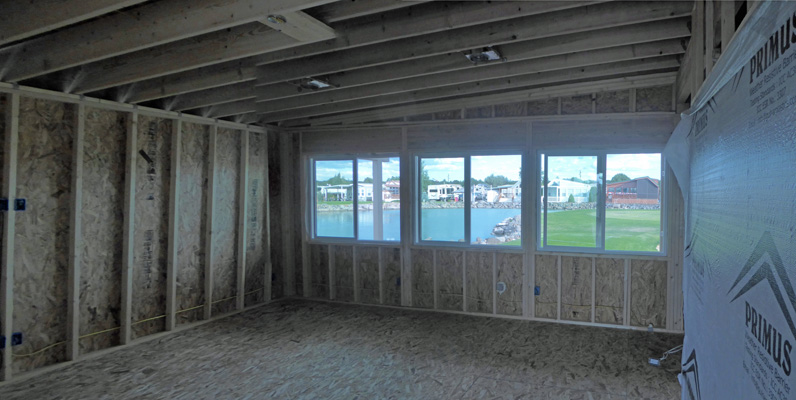
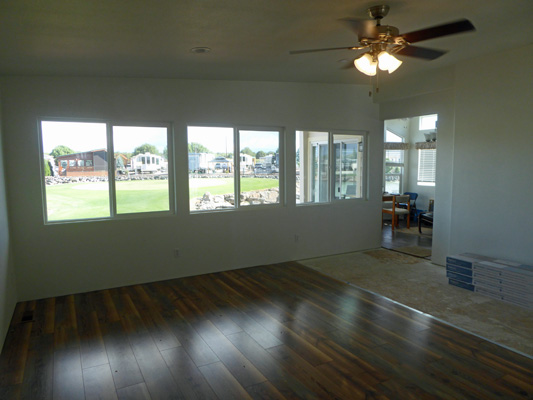
Here’s a clearer view of the room. There will be three 5 ft windows across the front and the door in the back with a 3ft window next to it to give us cross ventilation.
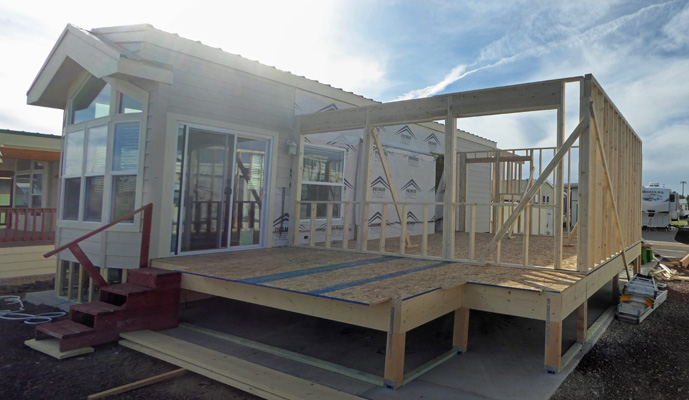
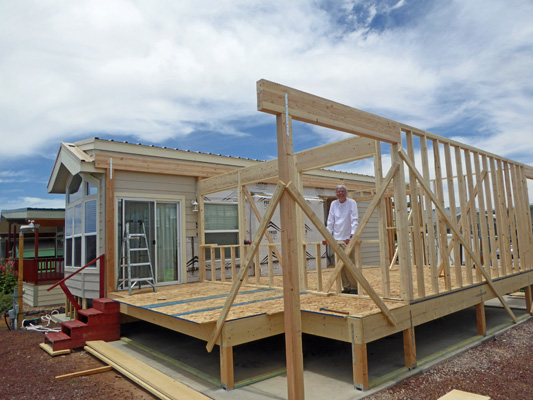
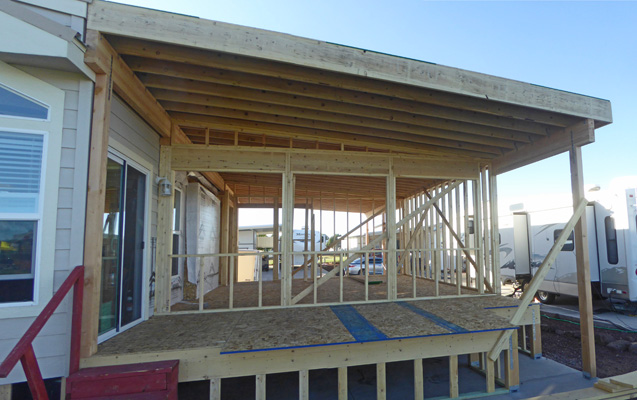
And here’s the view from the deck!
June 26th, was beam day. They started right at 7am putting up a 27 ft long beam along the side of the house to hold the rafters and spent much of the day putting up one after another all around the framing.
The shed got the rest of its rafters too.
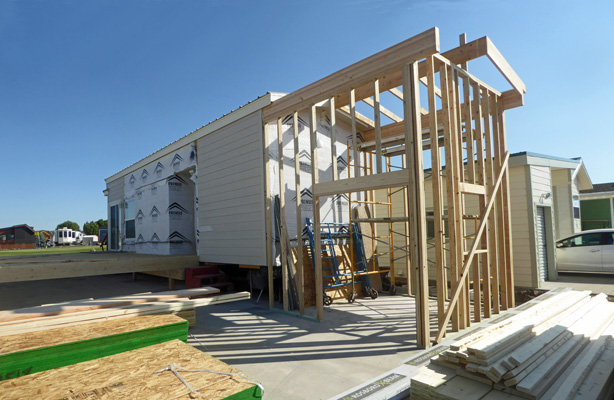
And now you can see how the shape of the carport.
And the beams that will hold up the roof over the deck.
They spent several hours in the afternoon building a pair of pony walls to support the rafters. It’s just that little triangular piece but each cross piece was specially cut to fit.
Here’s the second one.
Monday June 29th it was ferociously windy. Even our little weather station was recording gusts over 34 mph. The guys had planned to put up the rafters and there was no way you could be up on the high ladder to do that. They tried sheathing the shed and got the first row on but the wind turned those big pieces of sheathing into wings when they were lifted up to the second row. So they finished the framing on the skirting all around the house and gave up and went home before noon.
Here's the shed partially sheathed.
And here’s the view from the other side.
June 30th was a big day. The guys put up all the rafters and the sheathing on the roof. Meanwhile we hooked the trailer up and took it up to the parking area by the grand lodge so we could deliver it to our buyers who were coming mid-afternoon.
By 8:30, they had all the rafters up!
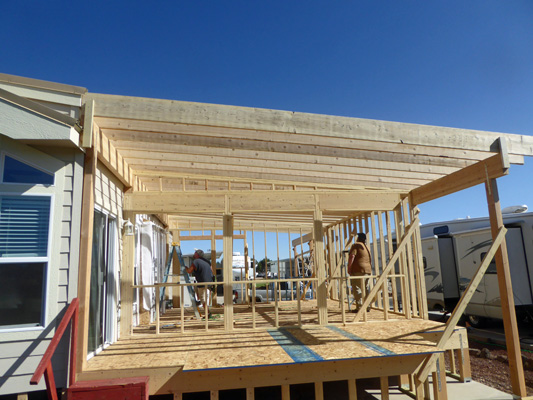
It took several more hours to get all the hardware nailed in place but by the time we set out to do our stint as gate hosts at noon they were well on their way to having that done too.
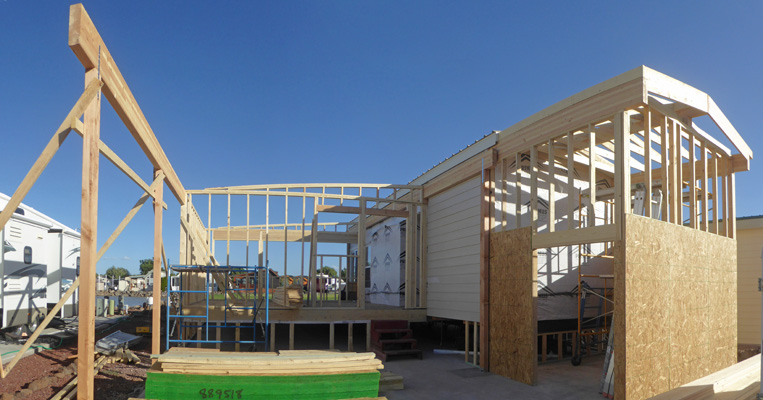
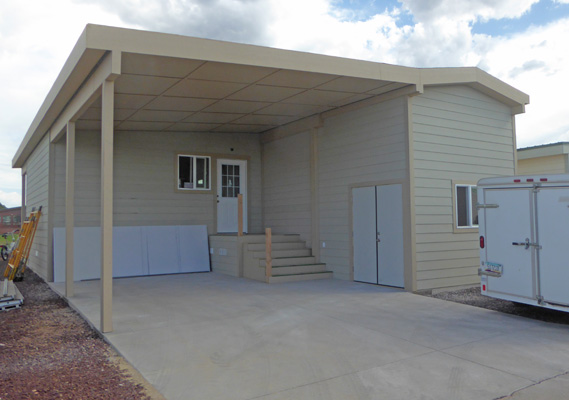
We came home to something that looked a whole lot more like a house than it did when we left.
Now you can see the full extent of the carport.
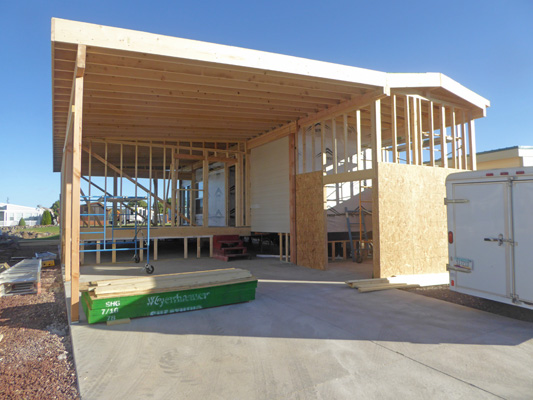
What the roof-line for the finished addition will be like.
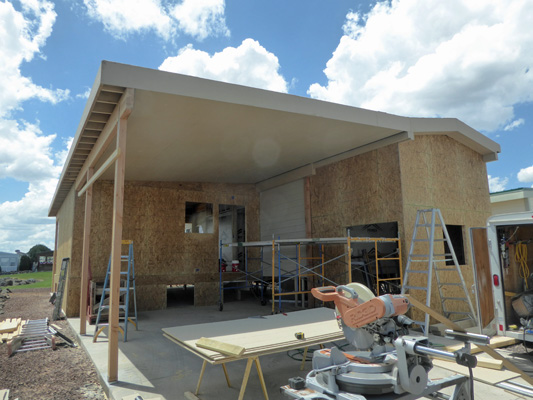
What the covered deck looks like.
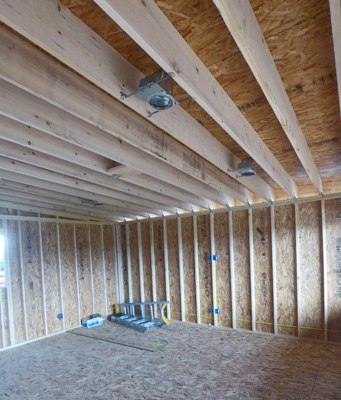
And how big the Arizona room is. In fact they had even started to frame in the closet for the washer and dryer over there in the corner.
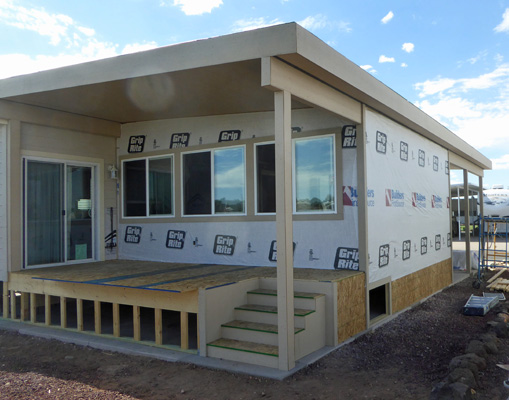
July 1st was sheathing day. It's amazing how much the place changed with the walls closed in. Now you can really tell where those big front windows will be.
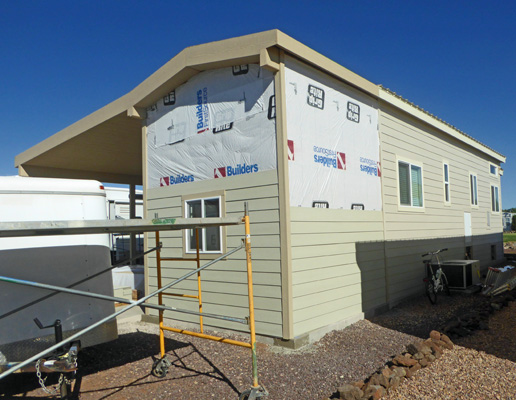
The view from the side makes the addition look really big.
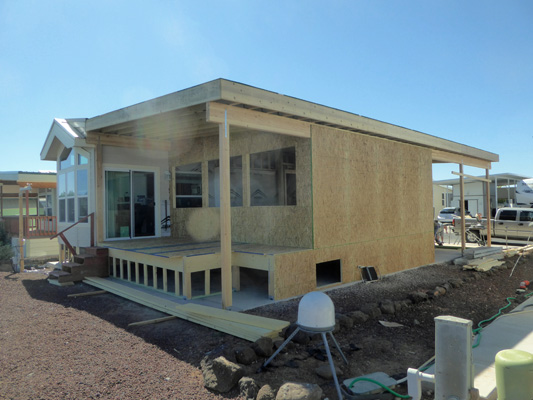
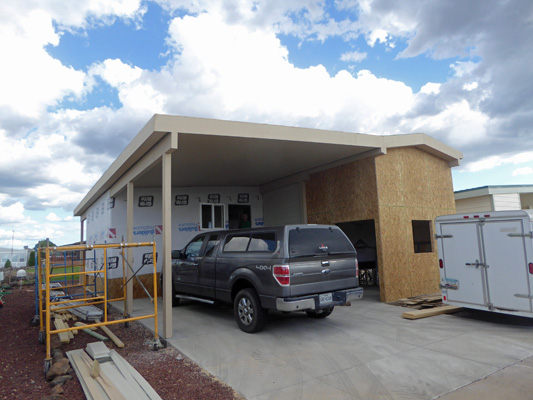
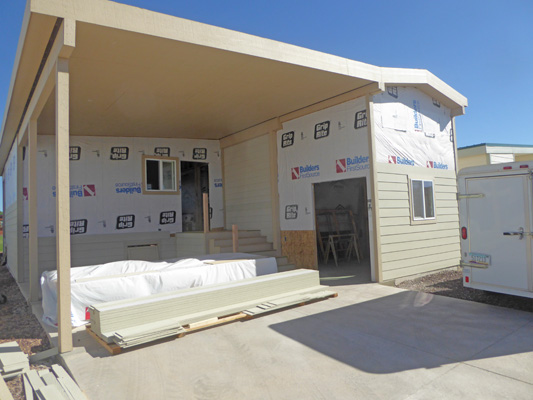
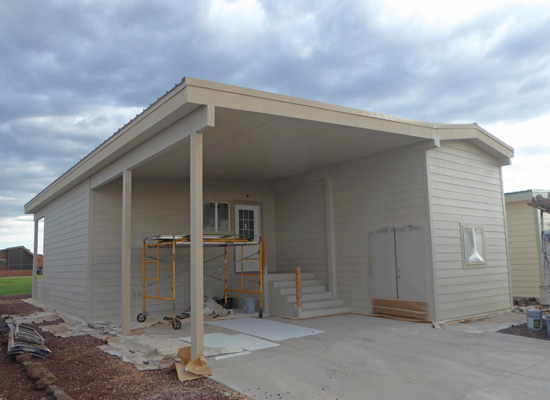
And the street-side view shows the full extent of the carport now.

Not only did they put all the sheathing on, they completed the framing on the inside wall adjoining the park model.
The window will come out and that's where the passageway between the house and the addition will be.
Now you can see the front door and the window next to it that we added for cross ventilation.
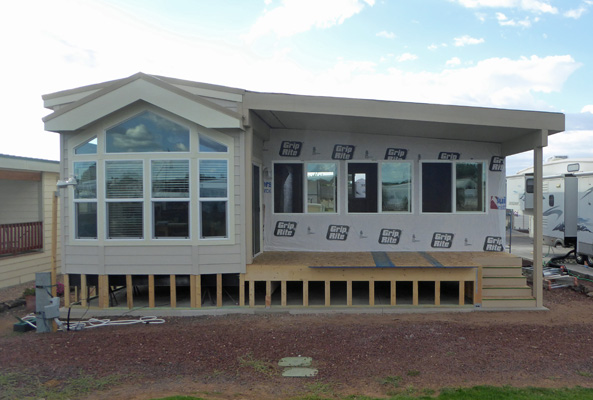
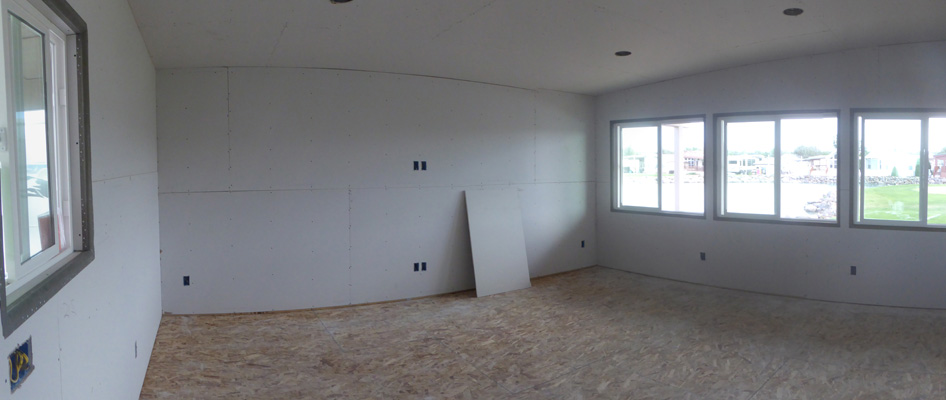
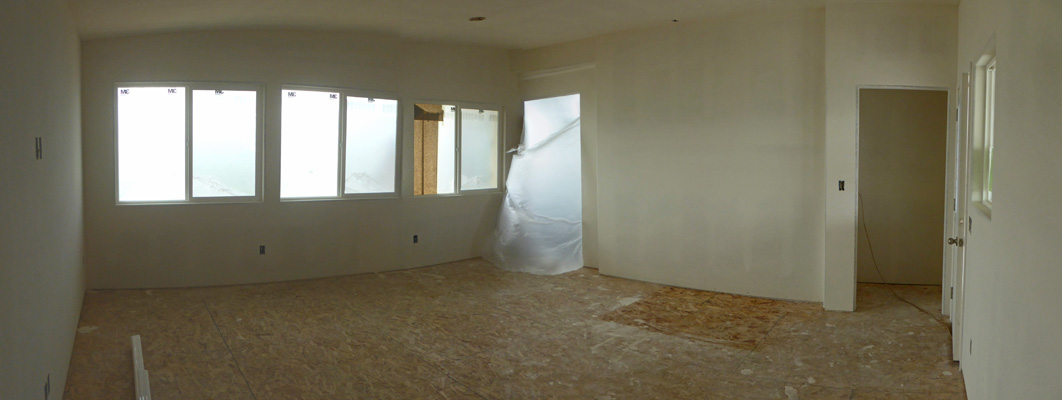
And you can see why we have those lovely big windows.
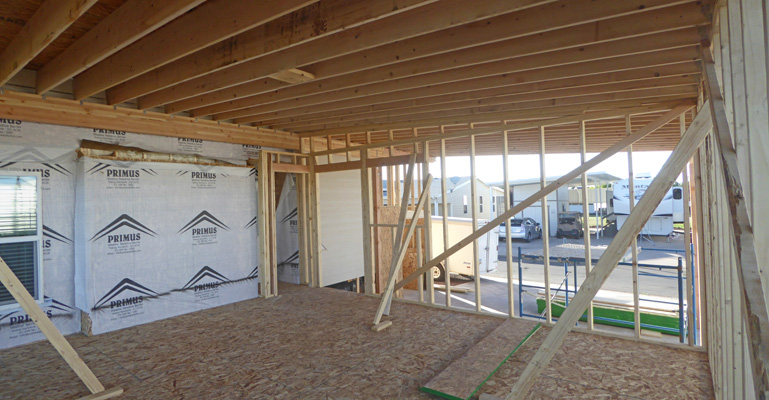
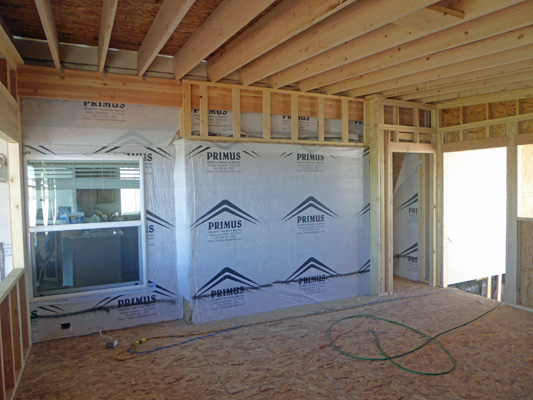
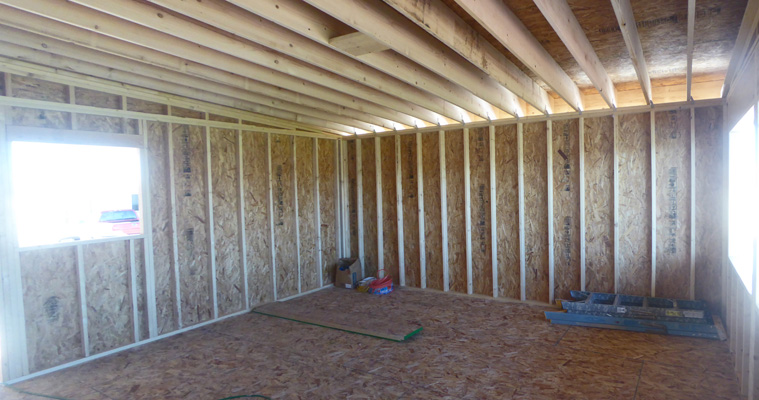
Here's the view standing in the future passageway. The room looks really big. And you can tell that they sheathed the roof too.
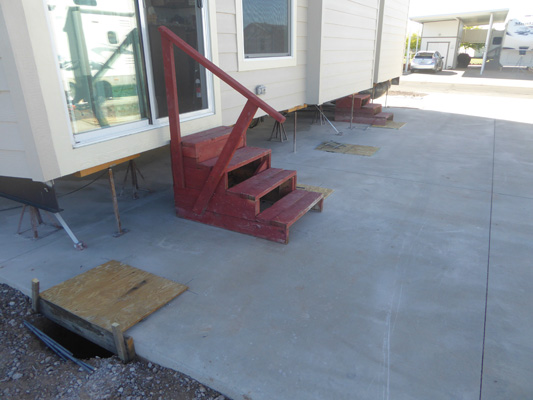
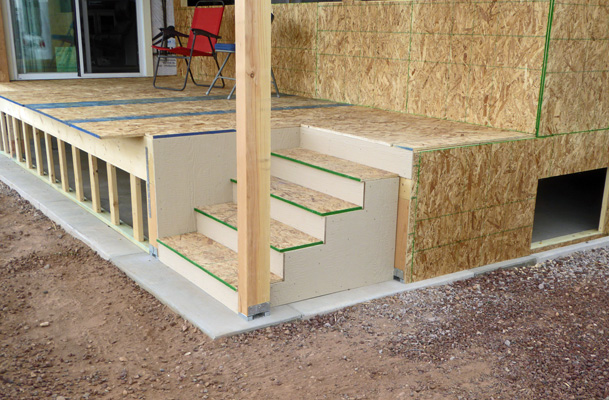
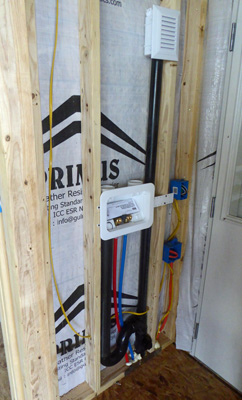
July 2nd they roughed in the electrical and we got stairs on the deck--hip hip hooray. No more rickety temporary stairs on this end of the house.
The stairs will be surfaced with Trex along with the deck--but not until everything else is finished.
Here's a quick look at the roughed in electrical. There are can lights in the ceiling along with a ceiling fan and tons of electrical outlets.
The inspector came while I was out walking around the lake (and talking to a neighbor). You can see him standing on the front deck admiring our view.

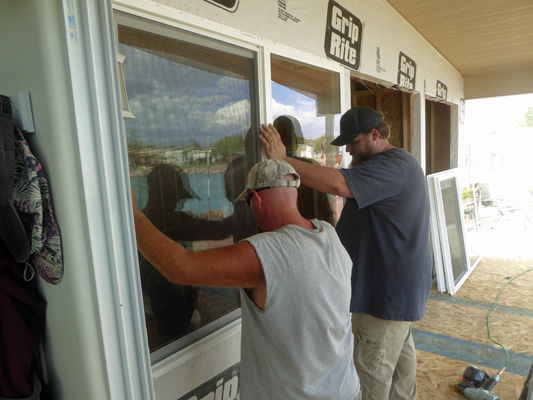
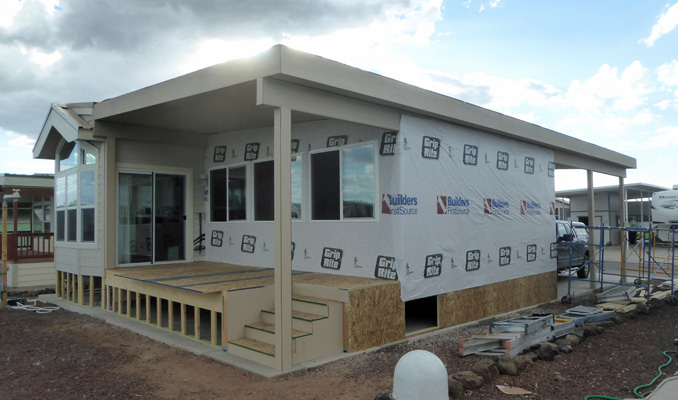
Friday July 3rd, they wrapped the house in moisture barrier (the roof too) and then put in the windows.
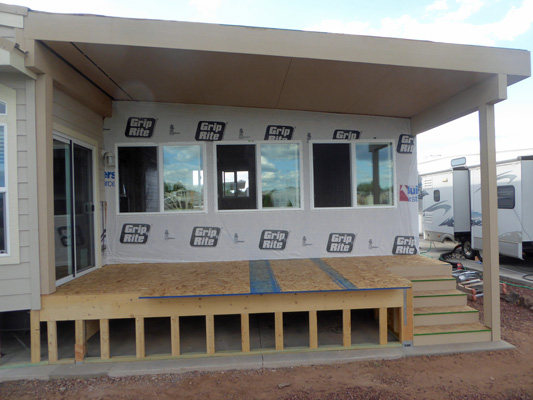
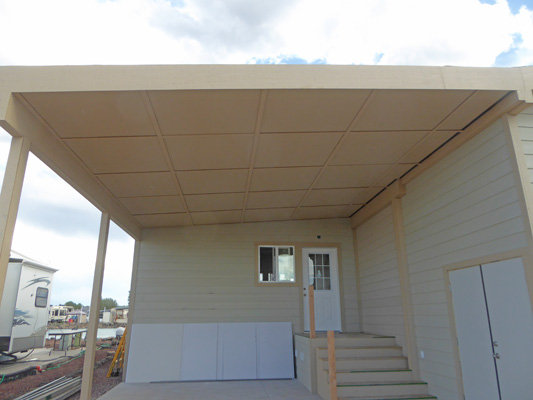
And then they began to close in 'the lid' on the deck and the carport.

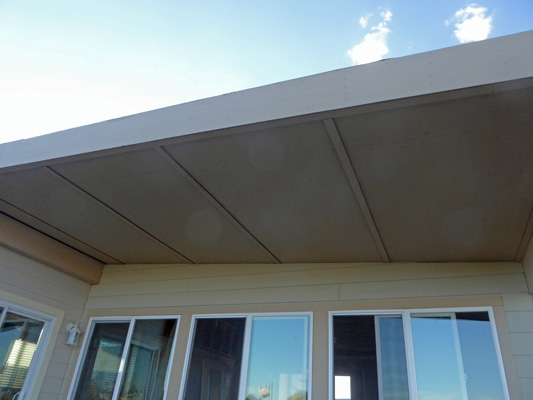
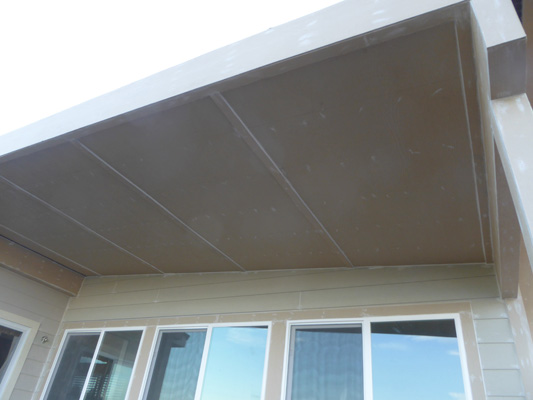
By the end of the day the deck had a lid and windows too and they had begun to put the trim on the eaves.
Here's a closer view of the deck lid.
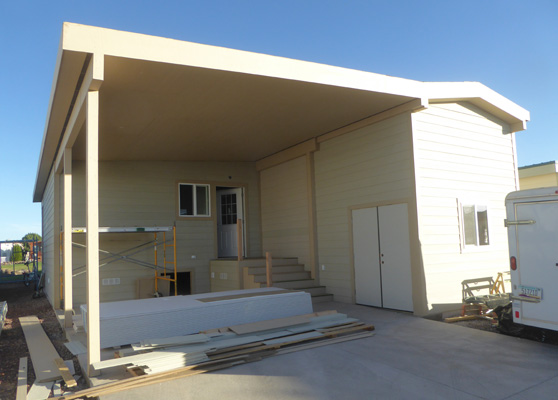
Here's the side view. That front pilar is wrapped in siding too.
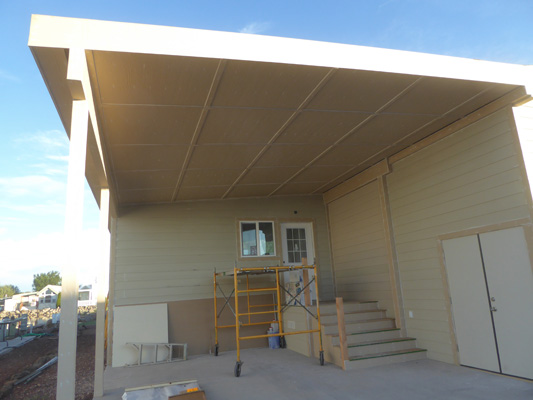
And here's the finished carport lid.
They began wrapping the pilars in the carport too.
And wonders of wonders they cleaned things up enough so we could park the truck in the carport for the first time!
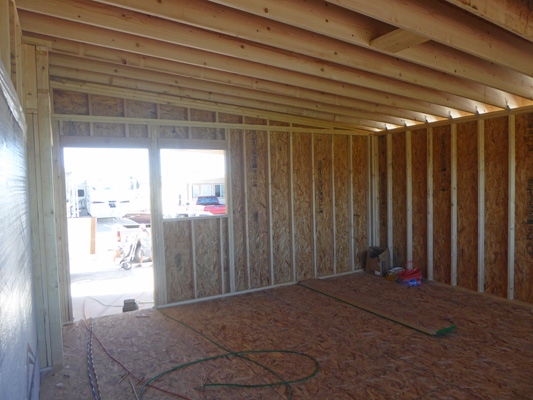
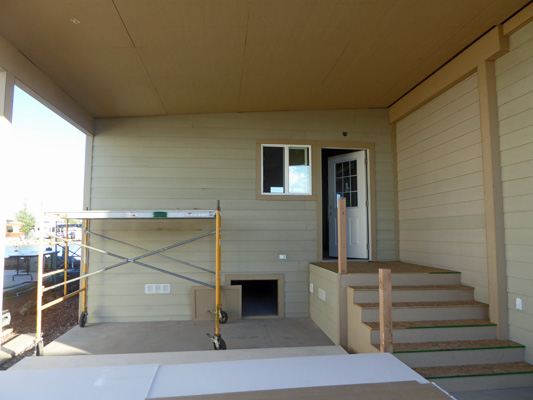
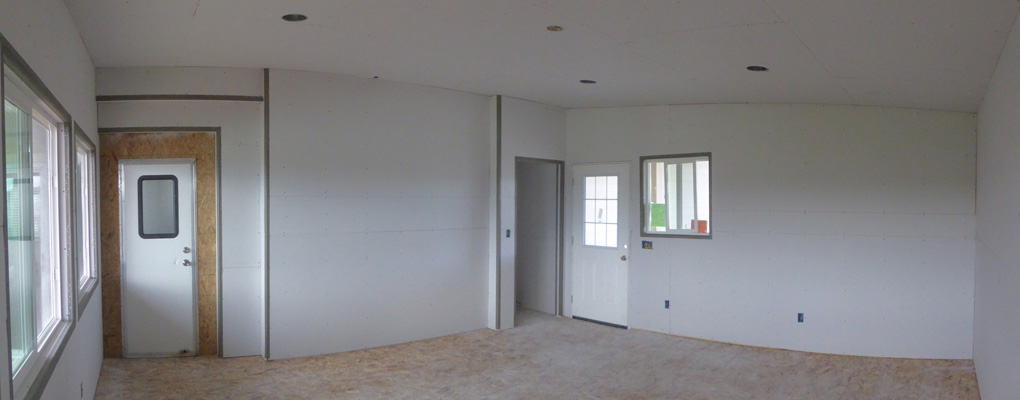
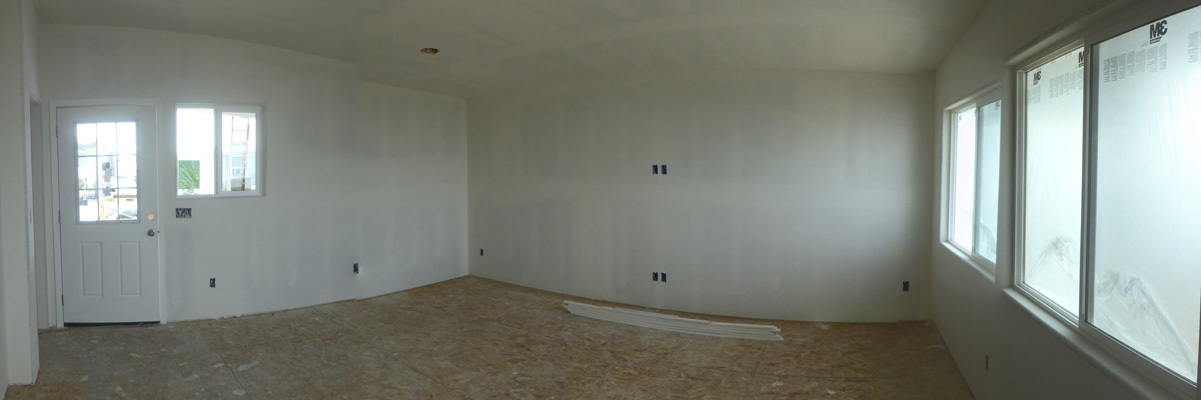
Here's what it looked like inside from the front door.
And here's the view towards the front door.

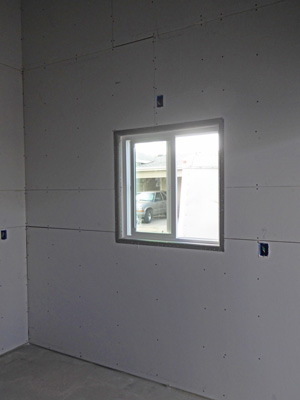
Monday July 6th, the shed got wrapped in moisture barrier and got its window. And they finished the trim too.
We got yet another delivery that consisted of siding and the insulation for the walls and the ceiling.
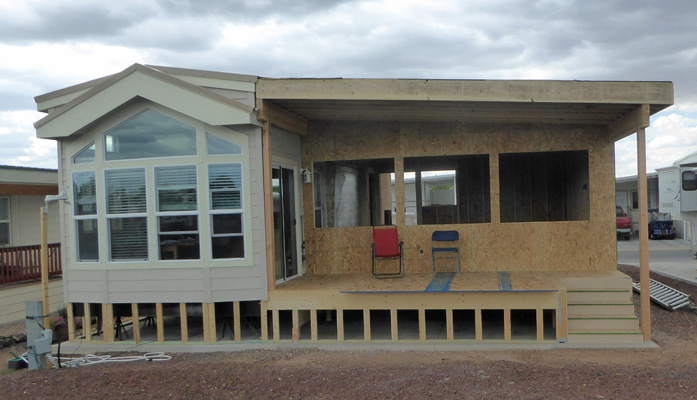
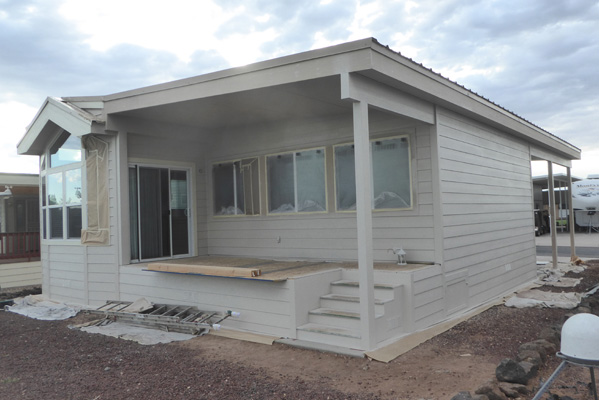
Meanwhile, we got front stairs! No more temporary stairs. Notice how there are 6 stairs on this side but only 5 on the lake side. The concrete slab was sloped that much!
The windows got trim and the corner of the building got trim too.
And the soffet along the eave of the house got closed in too.
Notice that there's trim around the access door on the skirting too.
The plumber came and hooked up the water and drain for the washer.
And the insulation got piled in the middle of the room ready to be installed.
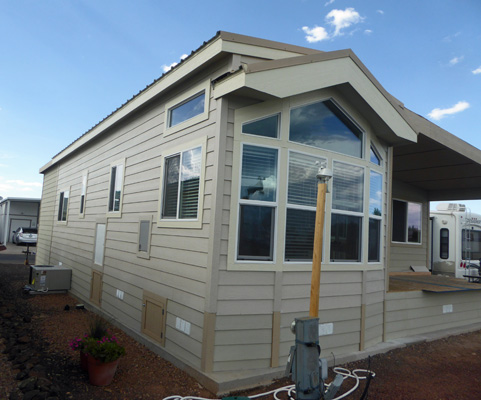
July 7th was a siding day. They made big progress on the lake side of the house.
And got started started on the siding for the shed.
You can see that they got the siding on the east side of the house and part-way around the front too.
July 8th, the finished up the siding on the both the side and the lake side.
The front of the house was almost done.
And the outside of the shed was done too.
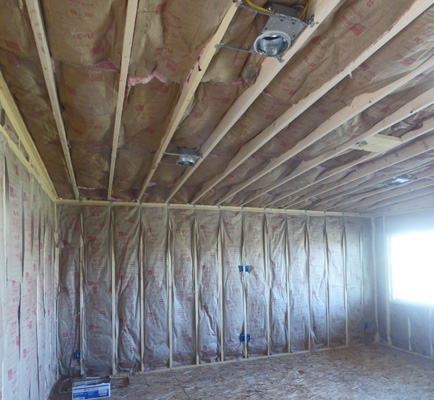
Meanwhile, inside all the insulation had been stuffed into the walls and ceiling (in the shed too).
July 9th, they put molding on the 'lid' of the deck.
And finished the siding on the street side of the house.
The shed got it's nice double doors.
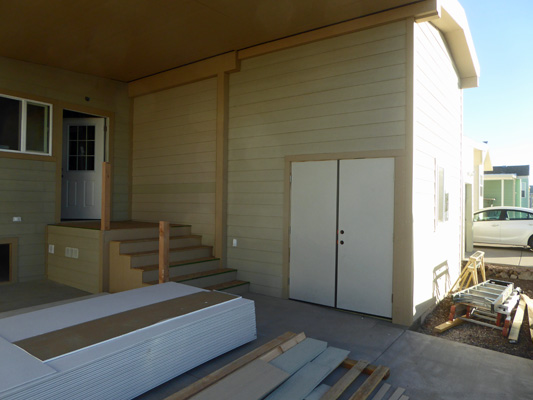
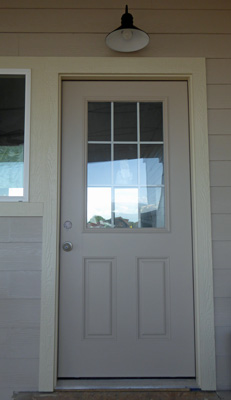
And the front door (with it's temporary glass) went in too. Of course, Home Depot notified us the night before that the door was backordered a month so Phillip had to find the same door with ordinary glass so he could put it in and finish the siding and trim.
Late in the day the most radical things happened. They took out the window between the park model and the addition and put up some particle board as a temporary barrier.
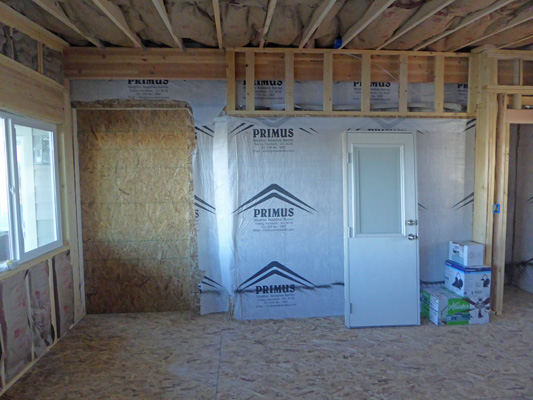
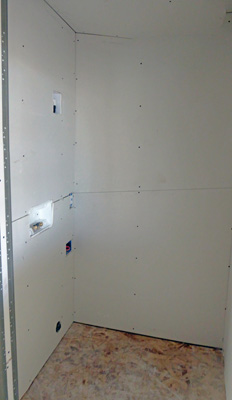
And they took the door out of the back of the laundry closet and framed it in and put insulation in it.
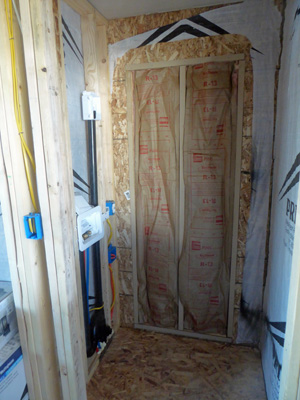
Now our only way in and out of the house was the sliding glass door in the dining room area. Here's the view from inside the park model.

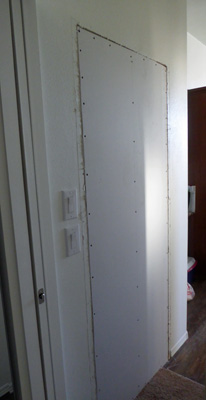
And here's where the back door used to be, all covered up with wall board.
Friday July 10th, they finished the last of the work on the siding--including installing all the access doors and the vents.
Now it was all ready for the painters to start work.
All the skirting had been sided and all the access doors installed.
And the lid over the carport got trim too.
Aside from some leftover sheet rock, all the building materials had been cleared away.
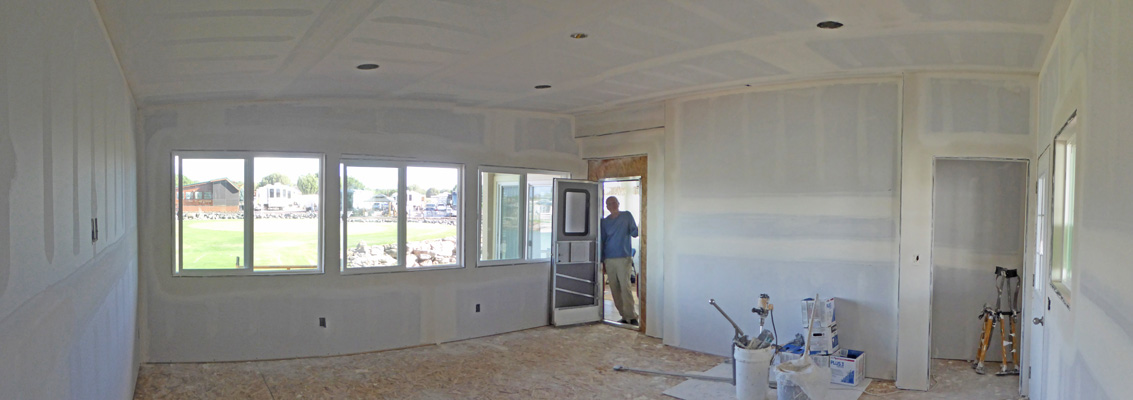
Meanwhile inside, two guys hung all the sheetrock in both the addition and the shed.
They were really fast.
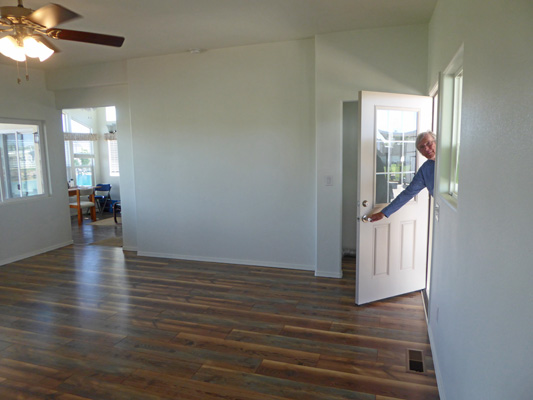
At the end of the day, Phillip came and put in an old temporary door for us. It looks like it came out of a trailer but in fact that's the kind of back door they used to put in park models until just a few years ago.
The laundry area got its sheet rock too.
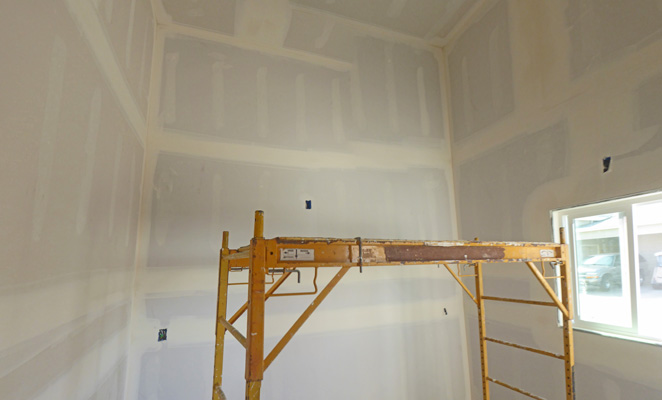
And all two stories of the shed did too.
Monday July 13th, we'd expected the painters to come and start work but they were busy finishing up a previous job and 'getting supplies'. The wall board mudder couldn't start work until the inspector came and he didn't show until after 5 pm. So it was a quiet day.
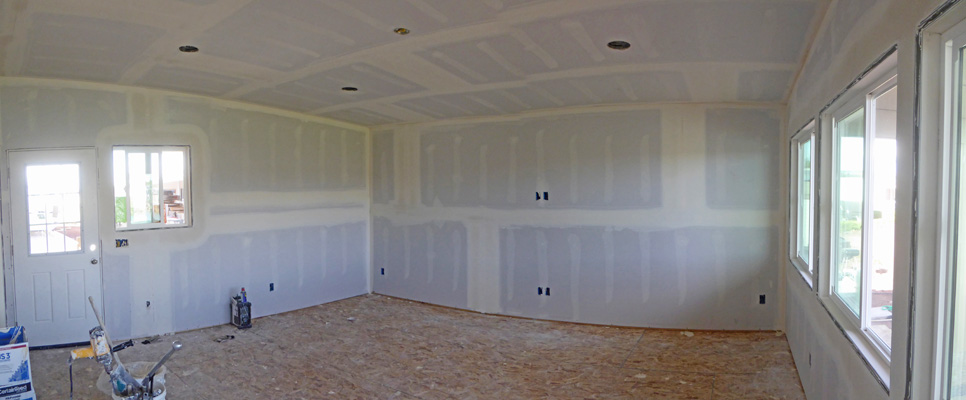
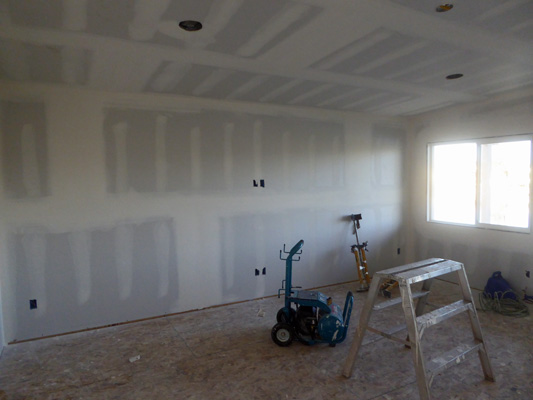
Tuesday July 14th, the painters still didn't show up until after noon but the mudder arrived in the morning and he worked most of the day mudding all the seams in the addition and the shed.
There's Walter looking through the temporary door.
And here's the shed. The mobile scaffolding sure got used a lot by the mudder and later the painters.
Meanwhile the painters set to work caulking every seam and nail in the place.
The painters spent all day the next day and half of the day on Thursday July 16th caulking. They caulked all that molding in carport lid.
And the lid over the deck too.
They used boxes and boxes of caulk.
Inside, the mudder continued to mud and sand and we finally lost the barrier between the house and the addition on Friday, so he could mud the old back door and the edges of the passageway between the park model and the addition.
He textured everything on Friday afternoon (what an amazing mess) but at least it was done for the weekend. Saturday Phillip and his crew came and cleaned the floor up (sweeping and vacuuming) to get ready for the painters.
We were left with billowing plastic between us and the addition but the good news is that it wasn't hot since the air conditioning wasn't hooked up to the addition yet.
We had rain early in the morning on Friday so the painters took a pass and said they would start painting on Monday.
Meanwhile all the hardware for our metal roof finally arrived.
And the roofers started work for half a day on Saturday before thunderheads chased them off the roof. They finished their work on Monday.
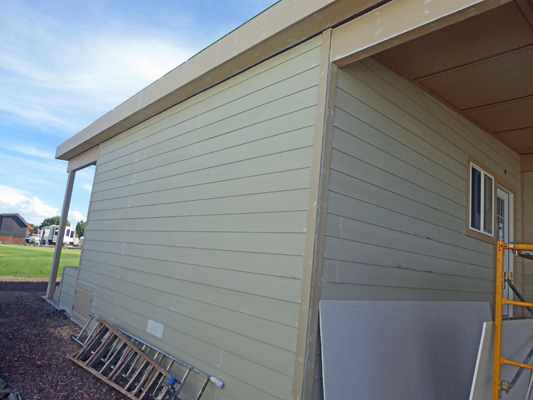
The painters worked in fits and starts on the outside for several days the next week. We had rain off and on but the siding got painted okay.
The pillars in the car port had to be hand painted because there was too much over-spray so it was a while before they got done.
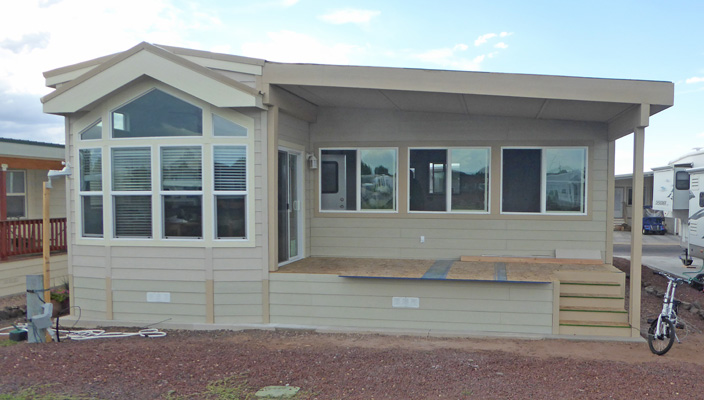
Finally on July 23rd they had all the trim on the outside done.
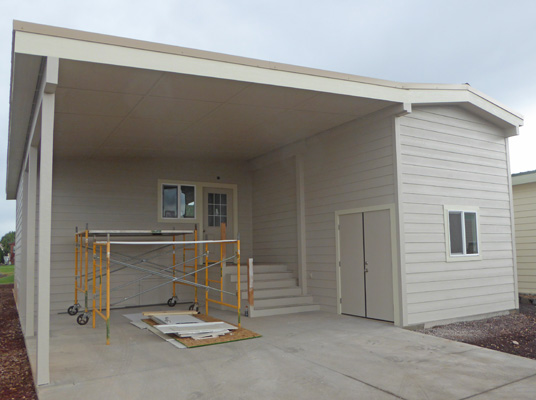
Including the front door (still waiting for its special glass).
You can see that the roof it all done too by the trim hanging over the eaves.
Meanwhile they had sprayed the inside with primer which needed 24 hours to cure. So at long last on Friday the paint inside was done too.
Friday morning, I heard that the flooring that I'd picked out way back in March (and which had been ordered for weeks) had been discontinued. So I needed to pick out something else preferably from what was in stock at Lowes or Home Depot here in Show Low. I spent the morning researching and looking at samples on-line and then went to town in the early afternoon and picked something out that looked like it would match (or at least go with) the linoleum in the park model.
Phillip then went right to Lowes and picked it up since they only had about twice what we needed and he didn't want someone to buy it up over the weekend.
Monday July 27th, the heating and cooling guy came and put in the vents and hooked up the system to the addition.
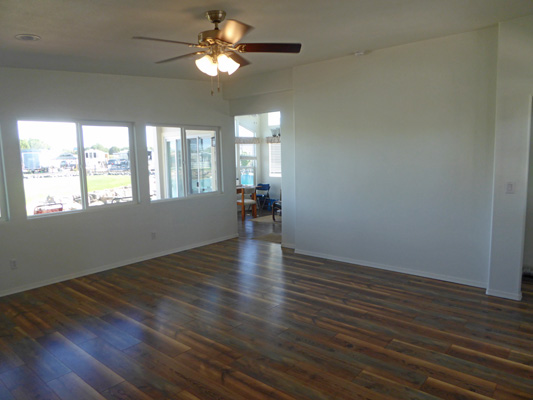
Tuesday July 28th, the guys were there bright and early finshing up the electrical: putting in all the outlets and switches, the can lights and the ceiling fan. Then in the afternoon they started to put in the flooring.
It's very pretty and some of it goes with the linoleum and some of it doesn't. Ah well. You win some and lose some.
Now you can actually see into the park model and out to our lovely view.
I hadn't wanted the light over the door to be way up in the lid where you couldn't reach it, so I found what is called a barn light to hang over the door.
And we replaced the rather tacky white porch light outside the slider too.
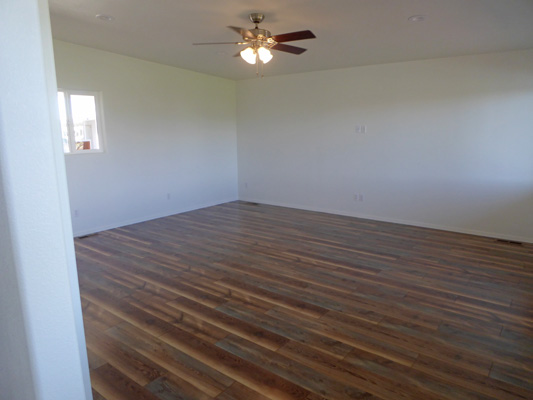
Wednesday July 29th, they finished the flooring.
And put in the molding.
They put in the permanent door handle and keyed the locks and told us we could move in.
They also power washed the floor in the shed and took away all the construction stuff and told us we could actually park in the carport again.
We're still waiting on bi-fold doors for the washer/dryer closet, the glass for the front door and the decks and railings. Welcome to construction during the pandemic.
We've ordered a couch (4 week wait), a rug, desks and desk chairs, plus a coffee table, end tables and a TV console. Some have arrived, some are on the way. The washer and dryer are supposed to be delivered on August 15th (I hope, I hope).
We've gotten a work bench and storage shelves for the shed (now known as the storage room) and while they are assembled we're still dealing with tying them to the wall so they won't tip over.
I'll update this as things are finished. The supply chain is still seriously impacted by Covid-19 and things come when they come.