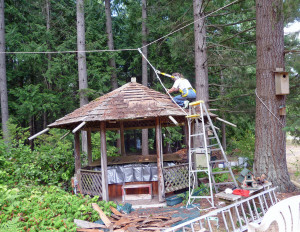
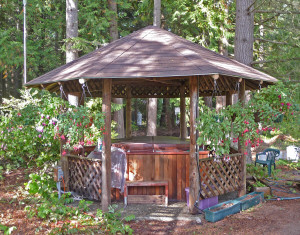
For a couple of years now we've been ignoring the steadily deteriorating cedar shingle roof of the gazebo that shelters our hot tub. The gazebo was here when we bought the place 22 years ago and needless to say the roof is way past it's expected lifespan. This spring the darned thing really began to leak and we decided it was time to bite the bullet and replace it.
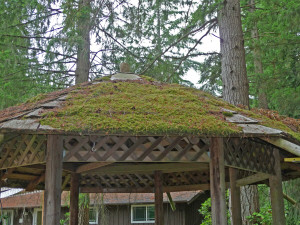
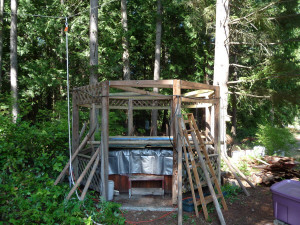
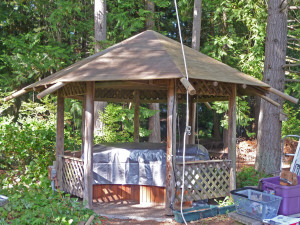
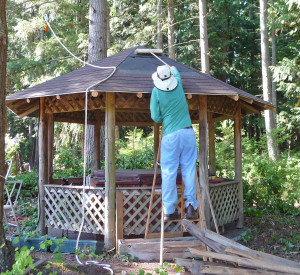
Here's what it looked like just before we started work. From this side it doesn't look too bad just a lot of needles right?

But from the north-facing side it was a different story. Look at the moss. Last summer we had fireweed and ferns growing in this section!
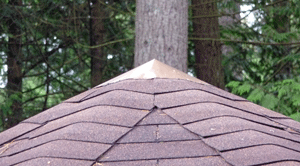
It looked like all we'd have to do is strip off the shingles and the skip sheathing under them and put up plywood and new shingles. A big job but definitely within our skills. But when we got to looking a little more carefully, we discovered that the kingpost that holds up the roof was way beyond saving. In fact it was totally rotten.
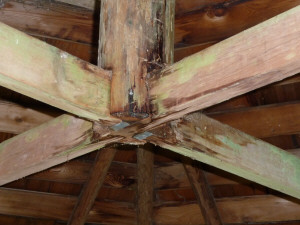
This is the top of the kingpost. I'm sure once upon a time it was squared off.

On the inside things didn't look so good either.
Now we had a SERIOUS project. To replace the kingpost, we were going to have to take off all the rafters too. We hemmed and hawed and talked to neighbors who have done construction. Finally we decided that we could probably do it ourselves, especially when you considered what someone might charge us to do such a strange custom job. So we located a source for the kingpost and new rafter poles and set to work.
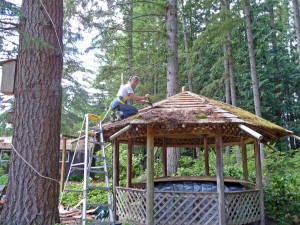
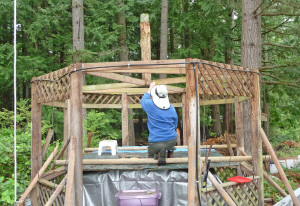
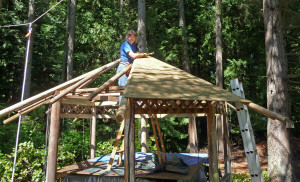
Walter doesn't enjoy heights very much and he wasn't nuts about the idea of me being up on the steep 7 in 12 pitch roof (that means that it gains 7 inches in height every 12 inches in width). So I agreed to learn to wear a safety harness to put his mind to rest. I'm happy to report that in 3 1/2 weeks I didn't fall and didn't get strangled by the darned thing either.
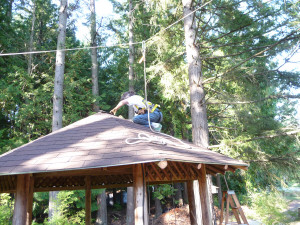
Here I am removing shingles (and peeling off mats of moss). While I was up on the roof prying them off with a pry bar, Walter spent his time taking nails out of the salvageable shingles to save for kindling. We now have all the kindling we'll need for years to come and so do our neighbors!
After 3 days, we had the shingles off and took a rainy day break to clean up the last of the debris before starting on taking off the skip sheathing. We both had sore muscles in places we didn't know we had muscles and were sleeping like babies at night.

Now came the fun part. Walter took a small sledge hammer to the sheathing from the inside. We put plywood on top of the hot tub so we'd have a place to stand for work like this. In very short order he had all the upper pieces of the sheathing off and I'd run for cover to avoid the flying debris.
The pieces further down the roof slope that were nailed to 4 rather than only two rafters were another matter. They didn't budge. So it was back to pry bars. Walter helped loosen things up by using a hole saw to drill 1 inch diameter circles out around the nails. With that we had the sheathing off in another day.
All those posts came off with a whack of the sledge and bit of twisting from the ground. (We saved the shorter posts that hadn't been attached to the kingpost to use again.)
In no time at all we were left with just the rotten kingpost.
Walter took a chisel to the wood around the nails.
And then we did a little more whacking and it was gone.
Of course, one of the rafters that it sat on had begun to rot so we had to figure out how to remove it.
We tried taking things apart in the order we thought they'd put it together in the first place but no go. In the end, Walter just took a saw to it and out it came. Ta Da!
All the rotten stuff was gone and we were ready to start putting it all back together again and it had only take us a week of hard work. We must be half way home, right? Hardly.
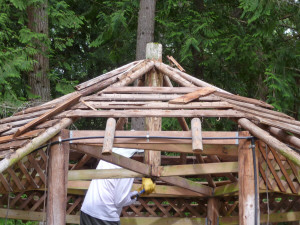
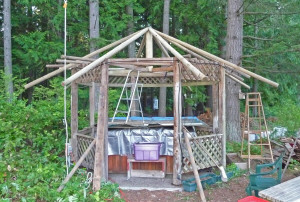
It took two days of fussing to get the new kingpost cut and chiseled to fit so that we could slip it over the base rafters.
And then we got to begin putting the new main posts in place. Only a couple of them had to be custom cut so they could all fit in just right around the kingpost. I got real good with a chisel!
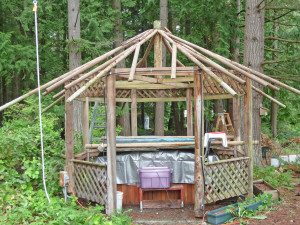
Then we hit challenge number 483: the old secondary posts were 1/2 inch narrower in diameter than the new main posts. But they all needed to be even to support the plywood that would go on top of them. Call in the consulting neighbor one more time! He suggested shims made from cedar shakes. And we just happened to have a few. So we cut a selection of shims and custom fitted each post so that it was level with the main ones. Fun!
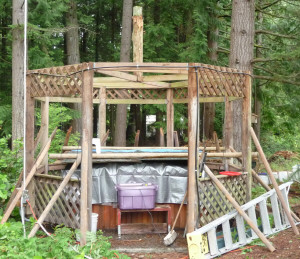
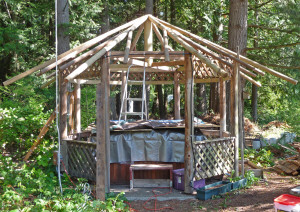
It's now starting to look like a gazebo again and the posts only took 2 days.
Next comes sheathing the whole thing with plywood. This was the part I was most concerned about because we had to muscle the ply up onto the roof to custom fit it since each section of the gazebo is just a little different from the next.
Walter figured out a jig for us that made it all pretty easy. We nailed a piece of 1 x 2 up in position where the bottom of the ply was supposed to hit. Then walked the ply up ladders and up onto the poles where it rested on the 1 x 2 while we marked where to cut it. Then we'd take it down, cut the ply and heave it back up to nail it in place. Then the left-over piece of ply was put up on the roof and marked, taken down, cut and heaved back up. Labor intensive to be sure but it worked.
We hammered the upper piece in place while standing on a ladder that was on top of the hot tub.
It took us 3 days of up and down and up and down the ladders as we worked our way around the 8 sides but we got there.
Next comes the roofing felt, aka tar paper.
It was pretty warm the day I put up the top row of felt and the last section was in the sun. I ended up smelling like a new road and having a pretty black behind! The amazing thing is that it only took two trips in the washer to get it all out!
Before we could go on with the shingles we had to cut off the posts even with the eaves. A workman at a neighbor's home had a reciprocating saw and with a new blade Walter had them all cut off in a matter of minutes. Amazing tools, really!
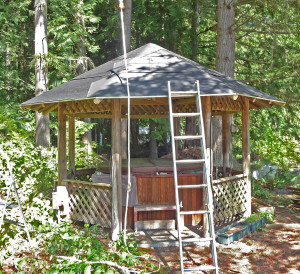
Okay, it's been two weeks now and we are now water tight. The shingles themselves shouldn't take that long, right? Wrong.
Because of the octagon shape and the narrowness of each section of the roof, every single shingle has to be trimmed to fit. And since each section is slightly different they all have to be custom fitted, marked and trimmed before being nailed in place.
But first we have to install the drip edge--trip number god knows how many around the gazebo with the ladders.
Then we decided to install the first 5 rows of shingles from the ground. So we made yet another trip all the way around the gazebo with the ladders. By now the St. Johnswort and salal that were growing around the base of the gazebo to start with, looked like a herd of elephants had been through. Not to worry. They're both almost impossible to kill and will be back with a vengeance next spring.
We took it easy and gave ourselves 2 days to do the first 5 rows of shingles (plus the starter row that goes under it). We averaged 1/2 hour per section--that's 5 minutes a shingle! But now at least I've got a nice rough surface to be on when I go up on the roof to do the rest of the shingles.
This was even slower! It took 2 hours per section to finish the next 10 rows of shingles.
First we had to sweep the tar paper because we're in the midst of needle fall!
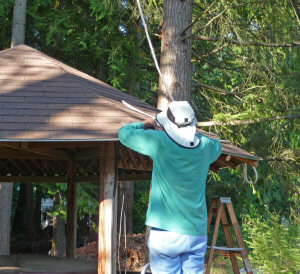
Then I'd climb up and Walter would hand me a shingle to fit and mark while he used a long 1 x 2 steady on it to keep it from sliding down the roof. Then it would go back down to him and he'd trim it.
Here's Walter trimming. I took this photo from the roof while I was waiting.

Then back up to me to be nailed in. Repeat over and over and over, all the while perched on a 7 in 12 pitch roof. Just staying in place used more energy and strange muscles than I ever thought possible!
4 days later the last shingle went into place.
And we thought the end was surely near. Wrong!
Now we've got to do the ridge caps for each of the 8 ridges.
Walter spent Tuesday cutting shingles into ridge caps while I got my hair cut and did the grocery shopping and laundry.
The first ridge shingle has to be custom cut to fit the eaves.
But then wonder of wonders, the next 14 just get hammered into place as is. What a novel idea. I just sped through them all in less than 2 hours while Walter finished cutting the last of them. By lunch time we were down the top three caps for each of the 8 ridges. Those 24 caps took 2 hours! Because once again they had to be fitted, marked and trimmed before I could hammer them in place.
By the end of the day on Wednesday, 3 1/2 weeks after we'd started, the shingles were done. Yahoo.
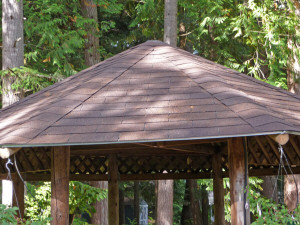
We had to wait awhile to get the piece of copper flashing to put on the very top of the king post but otherwise the roof was complete. Now it's in place too.
No way is that kingpost is going to rot on us again. It's got 6 layers of tar paper and 2 layers of shingles on it that's topped with the copper flashing. That's a far cry from the old one that was just hanging out there in the breeze totally unprotected.
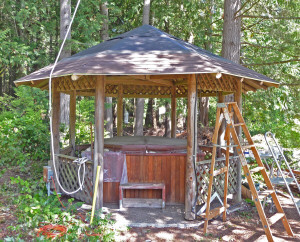
Thursday we installed hooks for my fuchsias and I reinstalled their drip irrigation. Then just to make a good job of it, I gave the 'body' of the gazebo (the part we hadn't replaced) a good cleaning too to remove the algae and dirt that had accumulated over the years.
At long last, here she is, all done with the fuchsias all back in place.
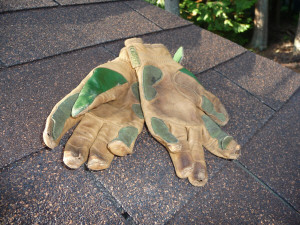
Now aren't you glad you just got to watch and didn't have to do any heavy lifting and make 10,000 trips up and down the ladders? Besides, you would have worn out a pair of gloves like I did.